Store Builder
Payhip’s store builder allows you to fully customize the design of your store to match your brand. From customizing colors and fonts, to adding new sections and pages, the store builder does it all 😄
In this article, we’ll cover the basics of getting started with the store builder. Are you ready? Alright, let’s dive in!
In this article:
Store builder basics
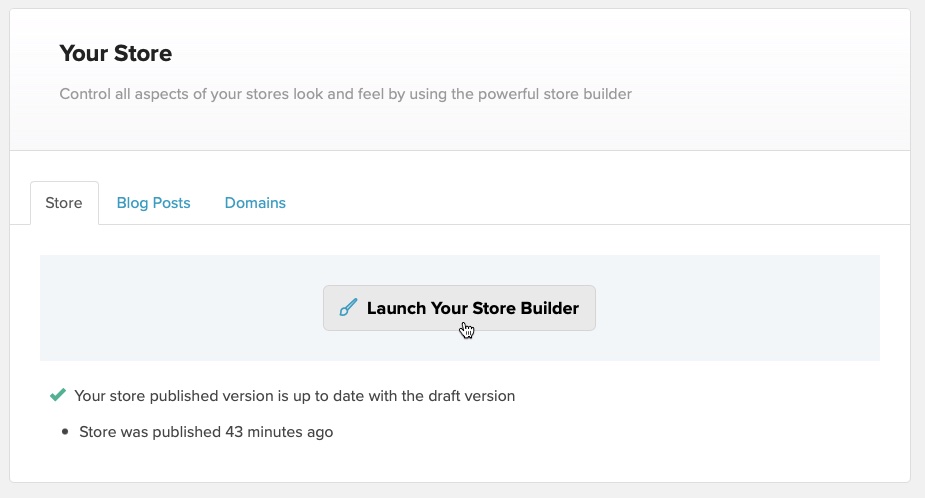
Launch the store builder
To launch the store builder, head to the Store page and click Launch Your Store Builder.
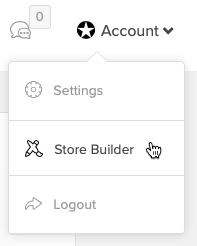
You can also click Account at the top right of the screen followed by Store Builder.
Pages and sections
#wistia_chrome_1107 #wistia_grid_1138_wrapper .w-css-reset{font-size:14px;} #wistia_chrome_1107 #wistia_grid_1138_wrapper div.w-css-reset{box-sizing:inherit;box-shadow:none;color:inherit;display:block;float:none;font:inherit;font-family:inherit;font-style:normal;font-weight:normal;font-size:inherit;letter-spacing:0;line-height:inherit;margin:0;max-height:none;max-width:none;min-height:0;min-width:0;padding:0;position:static;text-decoration:none;text-transform:none;text-shadow:none;transition:none;word-wrap:normal;-webkit-tap-highlight-color:rgba(0,0,0,0);-webkit-user-select:none;-webkit-font-smoothing:antialiased} #wistia_chrome_1107 #wistia_grid_1138_wrapper span.w-css-reset{box-sizing:inherit;box-shadow:none;color:inherit;display:block;float:none;font:inherit;font-family:inherit;font-style:normal;font-weight:normal;font-size:inherit;letter-spacing:0;line-height:inherit;margin:0;max-height:none;max-width:none;min-height:0;min-width:0;padding:0;position:static;text-decoration:none;text-transform:none;text-shadow:none;transition:none;word-wrap:normal;-webkit-tap-highlight-color:rgba(0,0,0,0);-webkit-user-select:none;-webkit-font-smoothing:antialiased} #wistia_chrome_1107 #wistia_grid_1138_wrapper ul.w-css-reset{box-sizing:inherit;box-shadow:none;color:inherit;display:block;float:none;font:inherit;font-family:inherit;font-style:normal;font-weight:normal;font-size:inherit;letter-spacing:0;line-height:inherit;margin:0;max-height:none;max-width:none;min-height:0;min-width:0;padding:0;position:static;text-decoration:none;text-transform:none;text-shadow:none;transition:none;word-wrap:normal;-webkit-tap-highlight-color:rgba(0,0,0,0);-webkit-user-select:none;-webkit-font-smoothing:antialiased} #wistia_chrome_1107 #wistia_grid_1138_wrapper li.w-css-reset{box-sizing:inherit;box-shadow:none;color:inherit;display:block;float:none;font:inherit;font-family:inherit;font-style:normal;font-weight:normal;font-size:inherit;letter-spacing:0;line-height:inherit;margin:0;max-height:none;max-width:none;min-height:0;min-width:0;padding:0;position:static;text-decoration:none;text-transform:none;text-shadow:none;transition:none;word-wrap:normal;-webkit-tap-highlight-color:rgba(0,0,0,0);-webkit-user-select:none;-webkit-font-smoothing:antialiased} #wistia_chrome_1107 #wistia_grid_1138_wrapper label.w-css-reset{box-sizing:inherit;box-shadow:none;color:inherit;display:block;float:none;font:inherit;font-family:inherit;font-style:normal;font-weight:normal;font-size:inherit;letter-spacing:0;line-height:inherit;margin:0;max-height:none;max-width:none;min-height:0;min-width:0;padding:0;position:static;text-decoration:none;text-transform:none;text-shadow:none;transition:none;word-wrap:normal;-webkit-tap-highlight-color:rgba(0,0,0,0);-webkit-user-select:none;-webkit-font-smoothing:antialiased} #wistia_chrome_1107 #wistia_grid_1138_wrapper fieldset.w-css-reset{box-sizing:inherit;box-shadow:none;color:inherit;display:block;float:none;font:inherit;font-family:inherit;font-style:normal;font-weight:normal;font-size:inherit;letter-spacing:0;line-height:inherit;margin:0;max-height:none;max-width:none;min-height:0;min-width:0;padding:0;position:static;text-decoration:none;text-transform:none;text-shadow:none;transition:none;word-wrap:normal;-webkit-tap-highlight-color:rgba(0,0,0,0);-webkit-user-select:none;-webkit-font-smoothing:antialiased} #wistia_chrome_1107 #wistia_grid_1138_wrapper button.w-css-reset{box-sizing:inherit;box-shadow:none;color:inherit;display:block;float:none;font:inherit;font-family:inherit;font-style:normal;font-weight:normal;font-size:inherit;letter-spacing:0;line-height:inherit;margin:0;max-height:none;max-width:none;min-height:0;min-width:0;padding:0;position:static;text-decoration:none;text-transform:none;text-shadow:none;transition:none;word-wrap:normal;-webkit-tap-highlight-color:rgba(0,0,0,0);-webkit-user-select:none;-webkit-font-smoothing:antialiased} #wistia_chrome_1107 #wistia_grid_1138_wrapper img.w-css-reset{box-sizing:inherit;box-shadow:none;color:inherit;display:block;float:none;font:inherit;font-family:inherit;font-style:normal;font-weight:normal;font-size:inherit;letter-spacing:0;line-height:inherit;margin:0;max-height:none;max-width:none;min-height:0;min-width:0;padding:0;position:static;text-decoration:none;text-transform:none;text-shadow:none;transition:none;word-wrap:normal;-webkit-tap-highlight-color:rgba(0,0,0,0);-webkit-user-select:none;-webkit-font-smoothing:antialiased} #wistia_chrome_1107 #wistia_grid_1138_wrapper a.w-css-reset{box-sizing:inherit;box-shadow:none;color:inherit;display:block;float:none;font:inherit;font-family:inherit;font-style:normal;font-weight:normal;font-size:inherit;letter-spacing:0;line-height:inherit;margin:0;max-height:none;max-width:none;min-height:0;min-width:0;padding:0;position:static;text-decoration:none;text-transform:none;text-shadow:none;transition:none;word-wrap:normal;-webkit-tap-highlight-color:rgba(0,0,0,0);-webkit-user-select:none;-webkit-font-smoothing:antialiased} #wistia_chrome_1107 #wistia_grid_1138_wrapper svg.w-css-reset{box-sizing:inherit;box-shadow:none;color:inherit;display:block;float:none;font:inherit;font-family:inherit;font-style:normal;font-weight:normal;font-size:inherit;letter-spacing:0;line-height:inherit;margin:0;max-height:none;max-width:none;min-height:0;min-width:0;padding:0;position:static;text-decoration:none;text-transform:none;text-shadow:none;transition:none;word-wrap:normal;-webkit-tap-highlight-color:rgba(0,0,0,0);-webkit-user-select:none;-webkit-font-smoothing:antialiased} #wistia_chrome_1107 #wistia_grid_1138_wrapper p.w-css-reset{box-sizing:inherit;box-shadow:none;color:inherit;display:block;float:none;font:inherit;font-family:inherit;font-style:normal;font-weight:normal;font-size:inherit;letter-spacing:0;line-height:inherit;margin:0;max-height:none;max-width:none;min-height:0;min-width:0;padding:0;position:static;text-decoration:none;text-transform:none;text-shadow:none;transition:none;word-wrap:normal;-webkit-tap-highlight-color:rgba(0,0,0,0);-webkit-user-select:none;-webkit-font-smoothing:antialiased} #wistia_chrome_1107 #wistia_grid_1138_wrapper a.w-css-reset{border:0;} #wistia_chrome_1107 #wistia_grid_1138_wrapper h1.w-css-reset{box-sizing:inherit;box-shadow:none;color:inherit;display:block;float:none;font:inherit;font-family:inherit;font-style:normal;font-weight:normal;font-size:2em;letter-spacing:0;line-height:inherit;margin:0;max-height:none;max-width:none;min-height:0;min-width:0;padding:0;position:static;text-decoration:none;text-transform:none;text-shadow:none;transition:none;word-wrap:normal;-webkit-tap-highlight-color:rgba(0,0,0,0);-webkit-user-select:none;-webkit-font-smoothing:antialiased} #wistia_chrome_1107 #wistia_grid_1138_wrapper h2.w-css-reset{box-sizing:inherit;box-shadow:none;color:inherit;display:block;float:none;font:inherit;font-family:inherit;font-style:normal;font-weight:normal;font-size:1.5em;letter-spacing:0;line-height:inherit;margin:0;max-height:none;max-width:none;min-height:0;min-width:0;padding:0;position:static;text-decoration:none;text-transform:none;text-shadow:none;transition:none;word-wrap:normal;-webkit-tap-highlight-color:rgba(0,0,0,0);-webkit-user-select:none;-webkit-font-smoothing:antialiased} #wistia_chrome_1107 #wistia_grid_1138_wrapper h3.w-css-reset{box-sizing:inherit;box-shadow:none;color:inherit;display:block;float:none;font:inherit;font-family:inherit;font-style:normal;font-weight:normal;font-size:1.17em;letter-spacing:0;line-height:inherit;margin:0;max-height:none;max-width:none;min-height:0;min-width:0;padding:0;position:static;text-decoration:none;text-transform:none;text-shadow:none;transition:none;word-wrap:normal;-webkit-tap-highlight-color:rgba(0,0,0,0);-webkit-user-select:none;-webkit-font-smoothing:antialiased} #wistia_chrome_1107 #wistia_grid_1138_wrapper p.w-css-reset{margin:1.4em 0;} #wistia_chrome_1107 #wistia_grid_1138_wrapper a.w-css-reset{display:inline;} #wistia_chrome_1107 #wistia_grid_1138_wrapper span.w-css-reset{display:inline;} #wistia_chrome_1107 #wistia_grid_1138_wrapper svg.w-css-reset{display:inline;} #wistia_chrome_1107 #wistia_grid_1138_wrapper ul.w-css-reset{box-sizing:inherit;box-shadow:none;color:inherit;display:block;float:none;font:inherit;font-family:inherit;font-style:normal;font-weight:normal;font-size:inherit;letter-spacing:0;line-height:inherit;margin:0;max-height:none;max-width:none;min-height:0;min-width:0;padding:0;position:static;text-decoration:none;text-transform:none;text-shadow:none;transition:none;word-wrap:normal;-webkit-tap-highlight-color:rgba(0,0,0,0);-webkit-user-select:none;-webkit-font-smoothing:antialiased;list-style-type:none} #wistia_chrome_1107 #wistia_grid_1138_wrapper ol.w-css-reset{box-sizing:inherit;box-shadow:none;color:inherit;display:block;float:none;font:inherit;font-family:inherit;font-style:normal;font-weight:normal;font-size:inherit;letter-spacing:0;line-height:inherit;margin:0;max-height:none;max-width:none;min-height:0;min-width:0;padding:0;position:static;text-decoration:none;text-transform:none;text-shadow:none;transition:none;word-wrap:normal;-webkit-tap-highlight-color:rgba(0,0,0,0);-webkit-user-select:none;-webkit-font-smoothing:antialiased;list-style-type:none} #wistia_chrome_1107 #wistia_grid_1138_wrapper li.w-css-reset{box-sizing:inherit;box-shadow:none;color:inherit;display:block;float:none;font:inherit;font-family:inherit;font-style:normal;font-weight:normal;font-size:inherit;letter-spacing:0;line-height:inherit;margin:0;max-height:none;max-width:none;min-height:0;min-width:0;padding:0;position:static;text-decoration:none;text-transform:none;text-shadow:none;transition:none;word-wrap:normal;-webkit-tap-highlight-color:rgba(0,0,0,0);-webkit-user-select:none;-webkit-font-smoothing:antialiased;list-style-type:none} #wistia_chrome_1107 #wistia_grid_1138_wrapper ul:before.w-css-reset{display:none} #wistia_chrome_1107 #wistia_grid_1138_wrapper ol:before.w-css-reset{display:none} #wistia_chrome_1107 #wistia_grid_1138_wrapper li:before.w-css-reset{display:none} #wistia_chrome_1107 #wistia_grid_1138_wrapper ul:after.w-css-reset{display:none} #wistia_chrome_1107 #wistia_grid_1138_wrapper ol:after.w-css-reset{display:none} #wistia_chrome_1107 #wistia_grid_1138_wrapper li:after.w-css-reset{display:none} #wistia_chrome_1107 #wistia_grid_1138_wrapper label.w-css-reset{background-attachment:scroll;background-color:transparent;background-image:none;background-position:0 0;background-repeat:no-repeat;background-size:100% 100%;float:none;outline:none} #wistia_chrome_1107 #wistia_grid_1138_wrapper button.w-css-reset{background-attachment:scroll;background-color:transparent;background-image:none;background-position:0 0;background-repeat:no-repeat;background-size:100% 100%;border:0;border-radius:0;outline:none;position:static} #wistia_chrome_1107 #wistia_grid_1138_wrapper img.w-css-reset{border:0;display:inline-block;vertical-align:top;border-radius:0;outline:none;position:static} #wistia_chrome_1107 #wistia_grid_1138_wrapper .w-css-reset button::-moz-focus-inner{border: 0;} #wistia_chrome_1107 #wistia_grid_1138_wrapper .w-css-reset-tree {font-size:14px;} #wistia_chrome_1107 #wistia_grid_1138_wrapper .w-css-reset-tree div{box-sizing:inherit;box-shadow:none;color:inherit;display:block;float:none;font:inherit;font-family:inherit;font-style:normal;font-weight:normal;font-size:inherit;letter-spacing:0;line-height:inherit;margin:0;max-height:none;max-width:none;min-height:0;min-width:0;padding:0;position:static;text-decoration:none;text-transform:none;text-shadow:none;transition:none;word-wrap:normal;-webkit-tap-highlight-color:rgba(0,0,0,0);-webkit-user-select:none;-webkit-font-smoothing:antialiased} #wistia_chrome_1107 #wistia_grid_1138_wrapper .w-css-reset-tree span{box-sizing:inherit;box-shadow:none;color:inherit;display:block;float:none;font:inherit;font-family:inherit;font-style:normal;font-weight:normal;font-size:inherit;letter-spacing:0;line-height:inherit;margin:0;max-height:none;max-width:none;min-height:0;min-width:0;padding:0;position:static;text-decoration:none;text-transform:none;text-shadow:none;transition:none;word-wrap:normal;-webkit-tap-highlight-color:rgba(0,0,0,0);-webkit-user-select:none;-webkit-font-smoothing:antialiased} #wistia_chrome_1107 #wistia_grid_1138_wrapper .w-css-reset-tree ul{box-sizing:inherit;box-shadow:none;color:inherit;display:block;float:none;font:inherit;font-family:inherit;font-style:normal;font-weight:normal;font-size:inherit;letter-spacing:0;line-height:inherit;margin:0;max-height:none;max-width:none;min-height:0;min-width:0;padding:0;position:static;text-decoration:none;text-transform:none;text-shadow:none;transition:none;word-wrap:normal;-webkit-tap-highlight-color:rgba(0,0,0,0);-webkit-user-select:none;-webkit-font-smoothing:antialiased} #wistia_chrome_1107 #wistia_grid_1138_wrapper .w-css-reset-tree li{box-sizing:inherit;box-shadow:none;color:inherit;display:block;float:none;font:inherit;font-family:inherit;font-style:normal;font-weight:normal;font-size:inherit;letter-spacing:0;line-height:inherit;margin:0;max-height:none;max-width:none;min-height:0;min-width:0;padding:0;position:static;text-decoration:none;text-transform:none;text-shadow:none;transition:none;word-wrap:normal;-webkit-tap-highlight-color:rgba(0,0,0,0);-webkit-user-select:none;-webkit-font-smoothing:antialiased} #wistia_chrome_1107 #wistia_grid_1138_wrapper .w-css-reset-tree label{box-sizing:inherit;box-shadow:none;color:inherit;display:block;float:none;font:inherit;font-family:inherit;font-style:normal;font-weight:normal;font-size:inherit;letter-spacing:0;line-height:inherit;margin:0;max-height:none;max-width:none;min-height:0;min-width:0;padding:0;position:static;text-decoration:none;text-transform:none;text-shadow:none;transition:none;word-wrap:normal;-webkit-tap-highlight-color:rgba(0,0,0,0);-webkit-user-select:none;-webkit-font-smoothing:antialiased} #wistia_chrome_1107 #wistia_grid_1138_wrapper .w-css-reset-tree fieldset{box-sizing:inherit;box-shadow:none;color:inherit;display:block;float:none;font:inherit;font-family:inherit;font-style:normal;font-weight:normal;font-size:inherit;letter-spacing:0;line-height:inherit;margin:0;max-height:none;max-width:none;min-height:0;min-width:0;padding:0;position:static;text-decoration:none;text-transform:none;text-shadow:none;transition:none;word-wrap:normal;-webkit-tap-highlight-color:rgba(0,0,0,0);-webkit-user-select:none;-webkit-font-smoothing:antialiased} #wistia_chrome_1107 #wistia_grid_1138_wrapper .w-css-reset-tree button{box-sizing:inherit;box-shadow:none;color:inherit;display:block;float:none;font:inherit;font-family:inherit;font-style:normal;font-weight:normal;font-size:inherit;letter-spacing:0;line-height:inherit;margin:0;max-height:none;max-width:none;min-height:0;min-width:0;padding:0;position:static;text-decoration:none;text-transform:none;text-shadow:none;transition:none;word-wrap:normal;-webkit-tap-highlight-color:rgba(0,0,0,0);-webkit-user-select:none;-webkit-font-smoothing:antialiased} #wistia_chrome_1107 #wistia_grid_1138_wrapper .w-css-reset-tree img{box-sizing:inherit;box-shadow:none;color:inherit;display:block;float:none;font:inherit;font-family:inherit;font-style:normal;font-weight:normal;font-size:inherit;letter-spacing:0;line-height:inherit;margin:0;max-height:none;max-width:none;min-height:0;min-width:0;padding:0;position:static;text-decoration:none;text-transform:none;text-shadow:none;transition:none;word-wrap:normal;-webkit-tap-highlight-color:rgba(0,0,0,0);-webkit-user-select:none;-webkit-font-smoothing:antialiased} #wistia_chrome_1107 #wistia_grid_1138_wrapper .w-css-reset-tree a{box-sizing:inherit;box-shadow:none;color:inherit;display:block;float:none;font:inherit;font-family:inherit;font-style:normal;font-weight:normal;font-size:inherit;letter-spacing:0;line-height:inherit;margin:0;max-height:none;max-width:none;min-height:0;min-width:0;padding:0;position:static;text-decoration:none;text-transform:none;text-shadow:none;transition:none;word-wrap:normal;-webkit-tap-highlight-color:rgba(0,0,0,0);-webkit-user-select:none;-webkit-font-smoothing:antialiased} #wistia_chrome_1107 #wistia_grid_1138_wrapper .w-css-reset-tree svg{box-sizing:inherit;box-shadow:none;color:inherit;display:block;float:none;font:inherit;font-family:inherit;font-style:normal;font-weight:normal;font-size:inherit;letter-spacing:0;line-height:inherit;margin:0;max-height:none;max-width:none;min-height:0;min-width:0;padding:0;position:static;text-decoration:none;text-transform:none;text-shadow:none;transition:none;word-wrap:normal;-webkit-tap-highlight-color:rgba(0,0,0,0);-webkit-user-select:none;-webkit-font-smoothing:antialiased} #wistia_chrome_1107 #wistia_grid_1138_wrapper .w-css-reset-tree p{box-sizing:inherit;box-shadow:none;color:inherit;display:block;float:none;font:inherit;font-family:inherit;font-style:normal;font-weight:normal;font-size:inherit;letter-spacing:0;line-height:inherit;margin:0;max-height:none;max-width:none;min-height:0;min-width:0;padding:0;position:static;text-decoration:none;text-transform:none;text-shadow:none;transition:none;word-wrap:normal;-webkit-tap-highlight-color:rgba(0,0,0,0);-webkit-user-select:none;-webkit-font-smoothing:antialiased} #wistia_chrome_1107 #wistia_grid_1138_wrapper .w-css-reset-tree a{border:0;} #wistia_chrome_1107 #wistia_grid_1138_wrapper .w-css-reset-tree h1{box-sizing:inherit;box-shadow:none;color:inherit;display:block;float:none;font:inherit;font-family:inherit;font-style:normal;font-weight:normal;font-size:2em;letter-spacing:0;line-height:inherit;margin:0;max-height:none;max-width:none;min-height:0;min-width:0;padding:0;position:static;text-decoration:none;text-transform:none;text-shadow:none;transition:none;word-wrap:normal;-webkit-tap-highlight-color:rgba(0,0,0,0);-webkit-user-select:none;-webkit-font-smoothing:antialiased} #wistia_chrome_1107 #wistia_grid_1138_wrapper .w-css-reset-tree h2{box-sizing:inherit;box-shadow:none;color:inherit;display:block;float:none;font:inherit;font-family:inherit;font-style:normal;font-weight:normal;font-size:1.5em;letter-spacing:0;line-height:inherit;margin:0;max-height:none;max-width:none;min-height:0;min-width:0;padding:0;position:static;text-decoration:none;text-transform:none;text-shadow:none;transition:none;word-wrap:normal;-webkit-tap-highlight-color:rgba(0,0,0,0);-webkit-user-select:none;-webkit-font-smoothing:antialiased} #wistia_chrome_1107 #wistia_grid_1138_wrapper .w-css-reset-tree h3{box-sizing:inherit;box-shadow:none;color:inherit;display:block;float:none;font:inherit;font-family:inherit;font-style:normal;font-weight:normal;font-size:1.17em;letter-spacing:0;line-height:inherit;margin:0;max-height:none;max-width:none;min-height:0;min-width:0;padding:0;position:static;text-decoration:none;text-transform:none;text-shadow:none;transition:none;word-wrap:normal;-webkit-tap-highlight-color:rgba(0,0,0,0);-webkit-user-select:none;-webkit-font-smoothing:antialiased} #wistia_chrome_1107 #wistia_grid_1138_wrapper .w-css-reset-tree p{margin:1.4em 0;} #wistia_chrome_1107 #wistia_grid_1138_wrapper .w-css-reset-tree a{display:inline;} #wistia_chrome_1107 #wistia_grid_1138_wrapper .w-css-reset-tree span{display:inline;} #wistia_chrome_1107 #wistia_grid_1138_wrapper .w-css-reset-tree svg{display:inline;} #wistia_chrome_1107 #wistia_grid_1138_wrapper .w-css-reset-tree ul{box-sizing:inherit;box-shadow:none;color:inherit;display:block;float:none;font:inherit;font-family:inherit;font-style:normal;font-weight:normal;font-size:inherit;letter-spacing:0;line-height:inherit;margin:0;max-height:none;max-width:none;min-height:0;min-width:0;padding:0;position:static;text-decoration:none;text-transform:none;text-shadow:none;transition:none;word-wrap:normal;-webkit-tap-highlight-color:rgba(0,0,0,0);-webkit-user-select:none;-webkit-font-smoothing:antialiased;list-style-type:none} #wistia_chrome_1107 #wistia_grid_1138_wrapper .w-css-reset-tree ol{box-sizing:inherit;box-shadow:none;color:inherit;display:block;float:none;font:inherit;font-family:inherit;font-style:normal;font-weight:normal;font-size:inherit;letter-spacing:0;line-height:inherit;margin:0;max-height:none;max-width:none;min-height:0;min-width:0;padding:0;position:static;text-decoration:none;text-transform:none;text-shadow:none;transition:none;word-wrap:normal;-webkit-tap-highlight-color:rgba(0,0,0,0);-webkit-user-select:none;-webkit-font-smoothing:antialiased;list-style-type:none} #wistia_chrome_1107 #wistia_grid_1138_wrapper .w-css-reset-tree li{box-sizing:inherit;box-shadow:none;color:inherit;display:block;float:none;font:inherit;font-family:inherit;font-style:normal;font-weight:normal;font-size:inherit;letter-spacing:0;line-height:inherit;margin:0;max-height:none;max-width:none;min-height:0;min-width:0;padding:0;position:static;text-decoration:none;text-transform:none;text-shadow:none;transition:none;word-wrap:normal;-webkit-tap-highlight-color:rgba(0,0,0,0);-webkit-user-select:none;-webkit-font-smoothing:antialiased;list-style-type:none} #wistia_chrome_1107 #wistia_grid_1138_wrapper .w-css-reset-tree ul:before{display:none} #wistia_chrome_1107 #wistia_grid_1138_wrapper .w-css-reset-tree ol:before{display:none} #wistia_chrome_1107 #wistia_grid_1138_wrapper .w-css-reset-tree li:before{display:none} #wistia_chrome_1107 #wistia_grid_1138_wrapper .w-css-reset-tree ul:after{display:none} #wistia_chrome_1107 #wistia_grid_1138_wrapper .w-css-reset-tree ol:after{display:none} #wistia_chrome_1107 #wistia_grid_1138_wrapper .w-css-reset-tree li:after{display:none} #wistia_chrome_1107 #wistia_grid_1138_wrapper .w-css-reset-tree label{background-attachment:scroll;background-color:transparent;background-image:none;background-position:0 0;background-repeat:no-repeat;background-size:100% 100%;float:none;outline:none} #wistia_chrome_1107 #wistia_grid_1138_wrapper .w-css-reset-tree button{background-attachment:scroll;background-color:transparent;background-image:none;background-position:0 0;background-repeat:no-repeat;background-size:100% 100%;border:0;border-radius:0;outline:none;position:static} #wistia_chrome_1107 #wistia_grid_1138_wrapper .w-css-reset-tree img{border:0;display:inline-block;vertical-align:top;border-radius:0;outline:none;position:static} #wistia_chrome_1107 #wistia_grid_1138_wrapper .w-css-reset-tree button::-moz-focus-inner{border: 0;} #wistia_chrome_1107 #wistia_grid_1138_wrapper .w-css-reset-max-width-none-important{max-width:none!important} #wistia_chrome_1107 #wistia_grid_1138_wrapper .w-css-reset-button-important{border-radius:0!important;color:#fff!important;}
#wistia_grid_1138_wrapper{-moz-box-sizing:content-box;-webkit-box-sizing:content-box;box-sizing:content-box;font-family:Arial,sans-serif;font-size:14px;height:100%;position:relative;text-align:left;width:100%;} #wistia_grid_1138_wrapper *{-moz-box-sizing:content-box;-webkit-box-sizing:content-box;box-sizing:content-box;} #wistia_grid_1138_above{position:relative;} #wistia_grid_1138_main{display:block;height:100%;position:relative;} #wistia_grid_1138_behind{height:100%;left:0;position:absolute;top:0;width:100%;} #wistia_grid_1138_center{height:100%;overflow:hidden;position:relative;width:100%;} #wistia_grid_1138_front{display:none;height:100%;left:0;position:absolute;top:0;width:100%;} #wistia_grid_1138_top_inside{position:absolute;left:0;top:0;width:100%;} #wistia_grid_1138_top{width:100%;position:absolute;bottom:0;left:0;} #wistia_grid_1138_bottom_inside{position:absolute;left:0;bottom:0;width:100%;} #wistia_grid_1138_bottom{width:100%;position:absolute;top:0;left:0;} #wistia_grid_1138_left_inside{height:100%;position:absolute;left:0;top:0;} #wistia_grid_1138_left{height:100%;position:absolute;right:0;top:0;} #wistia_grid_1138_right_inside{height:100%;right:0;position:absolute;top:0;} #wistia_grid_1138_right{height:100%;left:0;position:absolute;top:0;} #wistia_grid_1138_below{position:relative;}
Your Payhip store is made up of pages and these pages are made up of sections. From the store builder you can add new pages or customize the ones that are there by default.
The type of page that you’re currently on will be shown at the top left of the screen. You can click this to open up a directory of your store pages and choose the one that you’d like to work on.

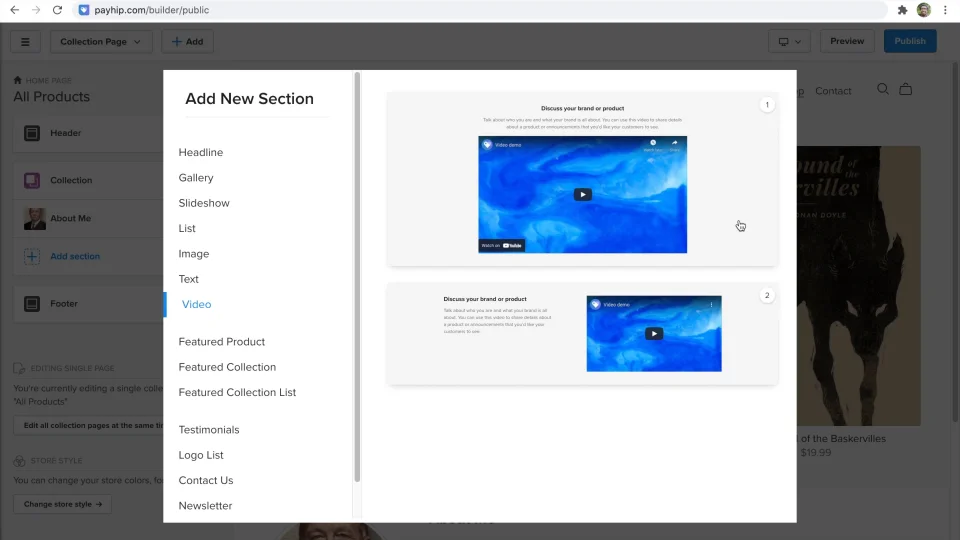
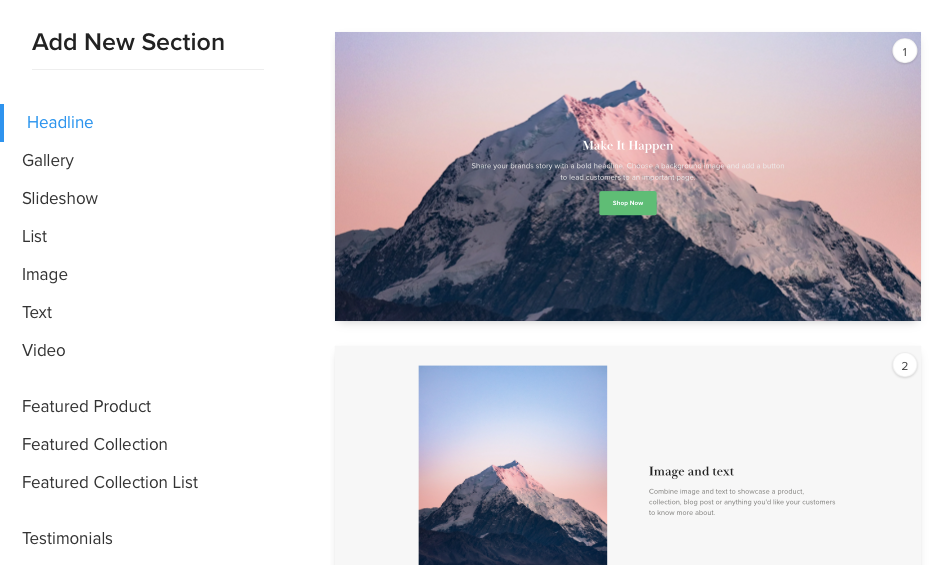
Click on a section to start editing it, or select Add section to add to the page. You’ll see that we have a bunch of different sections available to choose from!
Don’t forget to update the About Me section on your All Products page or your store will be published with the placeholder information that’s there.
Preview your store
You’ll see a preview of the page over on the right-hand side of the screen that will update as you make edits.
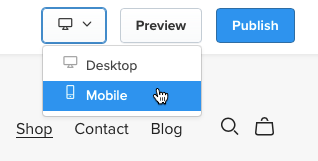
To see what your store will look like on a mobile device, you can click the dropdown menu at the top right of the screen and select Mobile.
To see what your live store site currently looks like you can hit Preview.
Not seeing your changes reflected when you preview your store? Hit the Publish button first.
Change the homepage
By default, the landing page for your store will be your All Products page. If you’d like to update this, go to the page that you’d like to set as the homepage and click the cog icon for it. Then select Set As Homepage.

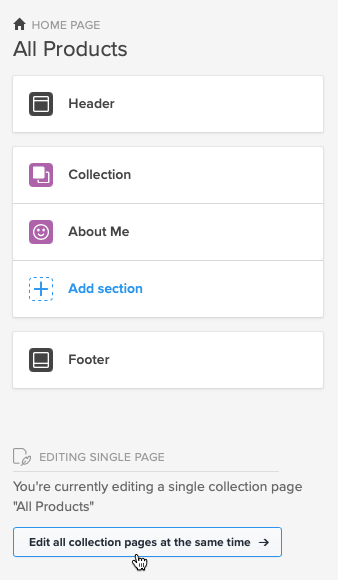
Edit all pages at the same time
You can edit all the pages of your store individually, but what if you want to make some general changes to a group of pages (e.g. your collections)? No problem! Click the Edit all pages at the same time button.
Exit the store builder
If you’re done customizing your site and want to head back to your Payhip admin dashboard, click the three lines at the top left of the screen and select Exit store builder.

Don't forget to customize your "About Me" section!
Colors
#wistia_chrome_929 #wistia_grid_945_wrapper .w-css-reset{font-size:14px;} #wistia_chrome_929 #wistia_grid_945_wrapper div.w-css-reset{box-sizing:inherit;box-shadow:none;color:inherit;display:block;float:none;font:inherit;font-family:inherit;font-style:normal;font-weight:normal;font-size:inherit;letter-spacing:0;line-height:inherit;margin:0;max-height:none;max-width:none;min-height:0;min-width:0;padding:0;position:static;text-decoration:none;text-transform:none;text-shadow:none;transition:none;word-wrap:normal;-webkit-tap-highlight-color:rgba(0,0,0,0);-webkit-user-select:none;-webkit-font-smoothing:antialiased} #wistia_chrome_929 #wistia_grid_945_wrapper span.w-css-reset{box-sizing:inherit;box-shadow:none;color:inherit;display:block;float:none;font:inherit;font-family:inherit;font-style:normal;font-weight:normal;font-size:inherit;letter-spacing:0;line-height:inherit;margin:0;max-height:none;max-width:none;min-height:0;min-width:0;padding:0;position:static;text-decoration:none;text-transform:none;text-shadow:none;transition:none;word-wrap:normal;-webkit-tap-highlight-color:rgba(0,0,0,0);-webkit-user-select:none;-webkit-font-smoothing:antialiased} #wistia_chrome_929 #wistia_grid_945_wrapper ul.w-css-reset{box-sizing:inherit;box-shadow:none;color:inherit;display:block;float:none;font:inherit;font-family:inherit;font-style:normal;font-weight:normal;font-size:inherit;letter-spacing:0;line-height:inherit;margin:0;max-height:none;max-width:none;min-height:0;min-width:0;padding:0;position:static;text-decoration:none;text-transform:none;text-shadow:none;transition:none;word-wrap:normal;-webkit-tap-highlight-color:rgba(0,0,0,0);-webkit-user-select:none;-webkit-font-smoothing:antialiased} #wistia_chrome_929 #wistia_grid_945_wrapper li.w-css-reset{box-sizing:inherit;box-shadow:none;color:inherit;display:block;float:none;font:inherit;font-family:inherit;font-style:normal;font-weight:normal;font-size:inherit;letter-spacing:0;line-height:inherit;margin:0;max-height:none;max-width:none;min-height:0;min-width:0;padding:0;position:static;text-decoration:none;text-transform:none;text-shadow:none;transition:none;word-wrap:normal;-webkit-tap-highlight-color:rgba(0,0,0,0);-webkit-user-select:none;-webkit-font-smoothing:antialiased} #wistia_chrome_929 #wistia_grid_945_wrapper label.w-css-reset{box-sizing:inherit;box-shadow:none;color:inherit;display:block;float:none;font:inherit;font-family:inherit;font-style:normal;font-weight:normal;font-size:inherit;letter-spacing:0;line-height:inherit;margin:0;max-height:none;max-width:none;min-height:0;min-width:0;padding:0;position:static;text-decoration:none;text-transform:none;text-shadow:none;transition:none;word-wrap:normal;-webkit-tap-highlight-color:rgba(0,0,0,0);-webkit-user-select:none;-webkit-font-smoothing:antialiased} #wistia_chrome_929 #wistia_grid_945_wrapper fieldset.w-css-reset{box-sizing:inherit;box-shadow:none;color:inherit;display:block;float:none;font:inherit;font-family:inherit;font-style:normal;font-weight:normal;font-size:inherit;letter-spacing:0;line-height:inherit;margin:0;max-height:none;max-width:none;min-height:0;min-width:0;padding:0;position:static;text-decoration:none;text-transform:none;text-shadow:none;transition:none;word-wrap:normal;-webkit-tap-highlight-color:rgba(0,0,0,0);-webkit-user-select:none;-webkit-font-smoothing:antialiased} #wistia_chrome_929 #wistia_grid_945_wrapper button.w-css-reset{box-sizing:inherit;box-shadow:none;color:inherit;display:block;float:none;font:inherit;font-family:inherit;font-style:normal;font-weight:normal;font-size:inherit;letter-spacing:0;line-height:inherit;margin:0;max-height:none;max-width:none;min-height:0;min-width:0;padding:0;position:static;text-decoration:none;text-transform:none;text-shadow:none;transition:none;word-wrap:normal;-webkit-tap-highlight-color:rgba(0,0,0,0);-webkit-user-select:none;-webkit-font-smoothing:antialiased} #wistia_chrome_929 #wistia_grid_945_wrapper img.w-css-reset{box-sizing:inherit;box-shadow:none;color:inherit;display:block;float:none;font:inherit;font-family:inherit;font-style:normal;font-weight:normal;font-size:inherit;letter-spacing:0;line-height:inherit;margin:0;max-height:none;max-width:none;min-height:0;min-width:0;padding:0;position:static;text-decoration:none;text-transform:none;text-shadow:none;transition:none;word-wrap:normal;-webkit-tap-highlight-color:rgba(0,0,0,0);-webkit-user-select:none;-webkit-font-smoothing:antialiased} #wistia_chrome_929 #wistia_grid_945_wrapper a.w-css-reset{box-sizing:inherit;box-shadow:none;color:inherit;display:block;float:none;font:inherit;font-family:inherit;font-style:normal;font-weight:normal;font-size:inherit;letter-spacing:0;line-height:inherit;margin:0;max-height:none;max-width:none;min-height:0;min-width:0;padding:0;position:static;text-decoration:none;text-transform:none;text-shadow:none;transition:none;word-wrap:normal;-webkit-tap-highlight-color:rgba(0,0,0,0);-webkit-user-select:none;-webkit-font-smoothing:antialiased} #wistia_chrome_929 #wistia_grid_945_wrapper svg.w-css-reset{box-sizing:inherit;box-shadow:none;color:inherit;display:block;float:none;font:inherit;font-family:inherit;font-style:normal;font-weight:normal;font-size:inherit;letter-spacing:0;line-height:inherit;margin:0;max-height:none;max-width:none;min-height:0;min-width:0;padding:0;position:static;text-decoration:none;text-transform:none;text-shadow:none;transition:none;word-wrap:normal;-webkit-tap-highlight-color:rgba(0,0,0,0);-webkit-user-select:none;-webkit-font-smoothing:antialiased} #wistia_chrome_929 #wistia_grid_945_wrapper p.w-css-reset{box-sizing:inherit;box-shadow:none;color:inherit;display:block;float:none;font:inherit;font-family:inherit;font-style:normal;font-weight:normal;font-size:inherit;letter-spacing:0;line-height:inherit;margin:0;max-height:none;max-width:none;min-height:0;min-width:0;padding:0;position:static;text-decoration:none;text-transform:none;text-shadow:none;transition:none;word-wrap:normal;-webkit-tap-highlight-color:rgba(0,0,0,0);-webkit-user-select:none;-webkit-font-smoothing:antialiased} #wistia_chrome_929 #wistia_grid_945_wrapper a.w-css-reset{border:0;} #wistia_chrome_929 #wistia_grid_945_wrapper h1.w-css-reset{box-sizing:inherit;box-shadow:none;color:inherit;display:block;float:none;font:inherit;font-family:inherit;font-style:normal;font-weight:normal;font-size:2em;letter-spacing:0;line-height:inherit;margin:0;max-height:none;max-width:none;min-height:0;min-width:0;padding:0;position:static;text-decoration:none;text-transform:none;text-shadow:none;transition:none;word-wrap:normal;-webkit-tap-highlight-color:rgba(0,0,0,0);-webkit-user-select:none;-webkit-font-smoothing:antialiased} #wistia_chrome_929 #wistia_grid_945_wrapper h2.w-css-reset{box-sizing:inherit;box-shadow:none;color:inherit;display:block;float:none;font:inherit;font-family:inherit;font-style:normal;font-weight:normal;font-size:1.5em;letter-spacing:0;line-height:inherit;margin:0;max-height:none;max-width:none;min-height:0;min-width:0;padding:0;position:static;text-decoration:none;text-transform:none;text-shadow:none;transition:none;word-wrap:normal;-webkit-tap-highlight-color:rgba(0,0,0,0);-webkit-user-select:none;-webkit-font-smoothing:antialiased} #wistia_chrome_929 #wistia_grid_945_wrapper h3.w-css-reset{box-sizing:inherit;box-shadow:none;color:inherit;display:block;float:none;font:inherit;font-family:inherit;font-style:normal;font-weight:normal;font-size:1.17em;letter-spacing:0;line-height:inherit;margin:0;max-height:none;max-width:none;min-height:0;min-width:0;padding:0;position:static;text-decoration:none;text-transform:none;text-shadow:none;transition:none;word-wrap:normal;-webkit-tap-highlight-color:rgba(0,0,0,0);-webkit-user-select:none;-webkit-font-smoothing:antialiased} #wistia_chrome_929 #wistia_grid_945_wrapper p.w-css-reset{margin:1.4em 0;} #wistia_chrome_929 #wistia_grid_945_wrapper a.w-css-reset{display:inline;} #wistia_chrome_929 #wistia_grid_945_wrapper span.w-css-reset{display:inline;} #wistia_chrome_929 #wistia_grid_945_wrapper svg.w-css-reset{display:inline;} #wistia_chrome_929 #wistia_grid_945_wrapper ul.w-css-reset{box-sizing:inherit;box-shadow:none;color:inherit;display:block;float:none;font:inherit;font-family:inherit;font-style:normal;font-weight:normal;font-size:inherit;letter-spacing:0;line-height:inherit;margin:0;max-height:none;max-width:none;min-height:0;min-width:0;padding:0;position:static;text-decoration:none;text-transform:none;text-shadow:none;transition:none;word-wrap:normal;-webkit-tap-highlight-color:rgba(0,0,0,0);-webkit-user-select:none;-webkit-font-smoothing:antialiased;list-style-type:none} #wistia_chrome_929 #wistia_grid_945_wrapper ol.w-css-reset{box-sizing:inherit;box-shadow:none;color:inherit;display:block;float:none;font:inherit;font-family:inherit;font-style:normal;font-weight:normal;font-size:inherit;letter-spacing:0;line-height:inherit;margin:0;max-height:none;max-width:none;min-height:0;min-width:0;padding:0;position:static;text-decoration:none;text-transform:none;text-shadow:none;transition:none;word-wrap:normal;-webkit-tap-highlight-color:rgba(0,0,0,0);-webkit-user-select:none;-webkit-font-smoothing:antialiased;list-style-type:none} #wistia_chrome_929 #wistia_grid_945_wrapper li.w-css-reset{box-sizing:inherit;box-shadow:none;color:inherit;display:block;float:none;font:inherit;font-family:inherit;font-style:normal;font-weight:normal;font-size:inherit;letter-spacing:0;line-height:inherit;margin:0;max-height:none;max-width:none;min-height:0;min-width:0;padding:0;position:static;text-decoration:none;text-transform:none;text-shadow:none;transition:none;word-wrap:normal;-webkit-tap-highlight-color:rgba(0,0,0,0);-webkit-user-select:none;-webkit-font-smoothing:antialiased;list-style-type:none} #wistia_chrome_929 #wistia_grid_945_wrapper ul:before.w-css-reset{display:none} #wistia_chrome_929 #wistia_grid_945_wrapper ol:before.w-css-reset{display:none} #wistia_chrome_929 #wistia_grid_945_wrapper li:before.w-css-reset{display:none} #wistia_chrome_929 #wistia_grid_945_wrapper ul:after.w-css-reset{display:none} #wistia_chrome_929 #wistia_grid_945_wrapper ol:after.w-css-reset{display:none} #wistia_chrome_929 #wistia_grid_945_wrapper li:after.w-css-reset{display:none} #wistia_chrome_929 #wistia_grid_945_wrapper label.w-css-reset{background-attachment:scroll;background-color:transparent;background-image:none;background-position:0 0;background-repeat:no-repeat;background-size:100% 100%;float:none;outline:none} #wistia_chrome_929 #wistia_grid_945_wrapper button.w-css-reset{background-attachment:scroll;background-color:transparent;background-image:none;background-position:0 0;background-repeat:no-repeat;background-size:100% 100%;border:0;border-radius:0;outline:none;position:static} #wistia_chrome_929 #wistia_grid_945_wrapper img.w-css-reset{border:0;display:inline-block;vertical-align:top;border-radius:0;outline:none;position:static} #wistia_chrome_929 #wistia_grid_945_wrapper .w-css-reset button::-moz-focus-inner{border: 0;} #wistia_chrome_929 #wistia_grid_945_wrapper .w-css-reset-tree {font-size:14px;} #wistia_chrome_929 #wistia_grid_945_wrapper .w-css-reset-tree div{box-sizing:inherit;box-shadow:none;color:inherit;display:block;float:none;font:inherit;font-family:inherit;font-style:normal;font-weight:normal;font-size:inherit;letter-spacing:0;line-height:inherit;margin:0;max-height:none;max-width:none;min-height:0;min-width:0;padding:0;position:static;text-decoration:none;text-transform:none;text-shadow:none;transition:none;word-wrap:normal;-webkit-tap-highlight-color:rgba(0,0,0,0);-webkit-user-select:none;-webkit-font-smoothing:antialiased} #wistia_chrome_929 #wistia_grid_945_wrapper .w-css-reset-tree span{box-sizing:inherit;box-shadow:none;color:inherit;display:block;float:none;font:inherit;font-family:inherit;font-style:normal;font-weight:normal;font-size:inherit;letter-spacing:0;line-height:inherit;margin:0;max-height:none;max-width:none;min-height:0;min-width:0;padding:0;position:static;text-decoration:none;text-transform:none;text-shadow:none;transition:none;word-wrap:normal;-webkit-tap-highlight-color:rgba(0,0,0,0);-webkit-user-select:none;-webkit-font-smoothing:antialiased} #wistia_chrome_929 #wistia_grid_945_wrapper .w-css-reset-tree ul{box-sizing:inherit;box-shadow:none;color:inherit;display:block;float:none;font:inherit;font-family:inherit;font-style:normal;font-weight:normal;font-size:inherit;letter-spacing:0;line-height:inherit;margin:0;max-height:none;max-width:none;min-height:0;min-width:0;padding:0;position:static;text-decoration:none;text-transform:none;text-shadow:none;transition:none;word-wrap:normal;-webkit-tap-highlight-color:rgba(0,0,0,0);-webkit-user-select:none;-webkit-font-smoothing:antialiased} #wistia_chrome_929 #wistia_grid_945_wrapper .w-css-reset-tree li{box-sizing:inherit;box-shadow:none;color:inherit;display:block;float:none;font:inherit;font-family:inherit;font-style:normal;font-weight:normal;font-size:inherit;letter-spacing:0;line-height:inherit;margin:0;max-height:none;max-width:none;min-height:0;min-width:0;padding:0;position:static;text-decoration:none;text-transform:none;text-shadow:none;transition:none;word-wrap:normal;-webkit-tap-highlight-color:rgba(0,0,0,0);-webkit-user-select:none;-webkit-font-smoothing:antialiased} #wistia_chrome_929 #wistia_grid_945_wrapper .w-css-reset-tree label{box-sizing:inherit;box-shadow:none;color:inherit;display:block;float:none;font:inherit;font-family:inherit;font-style:normal;font-weight:normal;font-size:inherit;letter-spacing:0;line-height:inherit;margin:0;max-height:none;max-width:none;min-height:0;min-width:0;padding:0;position:static;text-decoration:none;text-transform:none;text-shadow:none;transition:none;word-wrap:normal;-webkit-tap-highlight-color:rgba(0,0,0,0);-webkit-user-select:none;-webkit-font-smoothing:antialiased} #wistia_chrome_929 #wistia_grid_945_wrapper .w-css-reset-tree fieldset{box-sizing:inherit;box-shadow:none;color:inherit;display:block;float:none;font:inherit;font-family:inherit;font-style:normal;font-weight:normal;font-size:inherit;letter-spacing:0;line-height:inherit;margin:0;max-height:none;max-width:none;min-height:0;min-width:0;padding:0;position:static;text-decoration:none;text-transform:none;text-shadow:none;transition:none;word-wrap:normal;-webkit-tap-highlight-color:rgba(0,0,0,0);-webkit-user-select:none;-webkit-font-smoothing:antialiased} #wistia_chrome_929 #wistia_grid_945_wrapper .w-css-reset-tree button{box-sizing:inherit;box-shadow:none;color:inherit;display:block;float:none;font:inherit;font-family:inherit;font-style:normal;font-weight:normal;font-size:inherit;letter-spacing:0;line-height:inherit;margin:0;max-height:none;max-width:none;min-height:0;min-width:0;padding:0;position:static;text-decoration:none;text-transform:none;text-shadow:none;transition:none;word-wrap:normal;-webkit-tap-highlight-color:rgba(0,0,0,0);-webkit-user-select:none;-webkit-font-smoothing:antialiased} #wistia_chrome_929 #wistia_grid_945_wrapper .w-css-reset-tree img{box-sizing:inherit;box-shadow:none;color:inherit;display:block;float:none;font:inherit;font-family:inherit;font-style:normal;font-weight:normal;font-size:inherit;letter-spacing:0;line-height:inherit;margin:0;max-height:none;max-width:none;min-height:0;min-width:0;padding:0;position:static;text-decoration:none;text-transform:none;text-shadow:none;transition:none;word-wrap:normal;-webkit-tap-highlight-color:rgba(0,0,0,0);-webkit-user-select:none;-webkit-font-smoothing:antialiased} #wistia_chrome_929 #wistia_grid_945_wrapper .w-css-reset-tree a{box-sizing:inherit;box-shadow:none;color:inherit;display:block;float:none;font:inherit;font-family:inherit;font-style:normal;font-weight:normal;font-size:inherit;letter-spacing:0;line-height:inherit;margin:0;max-height:none;max-width:none;min-height:0;min-width:0;padding:0;position:static;text-decoration:none;text-transform:none;text-shadow:none;transition:none;word-wrap:normal;-webkit-tap-highlight-color:rgba(0,0,0,0);-webkit-user-select:none;-webkit-font-smoothing:antialiased} #wistia_chrome_929 #wistia_grid_945_wrapper .w-css-reset-tree svg{box-sizing:inherit;box-shadow:none;color:inherit;display:block;float:none;font:inherit;font-family:inherit;font-style:normal;font-weight:normal;font-size:inherit;letter-spacing:0;line-height:inherit;margin:0;max-height:none;max-width:none;min-height:0;min-width:0;padding:0;position:static;text-decoration:none;text-transform:none;text-shadow:none;transition:none;word-wrap:normal;-webkit-tap-highlight-color:rgba(0,0,0,0);-webkit-user-select:none;-webkit-font-smoothing:antialiased} #wistia_chrome_929 #wistia_grid_945_wrapper .w-css-reset-tree p{box-sizing:inherit;box-shadow:none;color:inherit;display:block;float:none;font:inherit;font-family:inherit;font-style:normal;font-weight:normal;font-size:inherit;letter-spacing:0;line-height:inherit;margin:0;max-height:none;max-width:none;min-height:0;min-width:0;padding:0;position:static;text-decoration:none;text-transform:none;text-shadow:none;transition:none;word-wrap:normal;-webkit-tap-highlight-color:rgba(0,0,0,0);-webkit-user-select:none;-webkit-font-smoothing:antialiased} #wistia_chrome_929 #wistia_grid_945_wrapper .w-css-reset-tree a{border:0;} #wistia_chrome_929 #wistia_grid_945_wrapper .w-css-reset-tree h1{box-sizing:inherit;box-shadow:none;color:inherit;display:block;float:none;font:inherit;font-family:inherit;font-style:normal;font-weight:normal;font-size:2em;letter-spacing:0;line-height:inherit;margin:0;max-height:none;max-width:none;min-height:0;min-width:0;padding:0;position:static;text-decoration:none;text-transform:none;text-shadow:none;transition:none;word-wrap:normal;-webkit-tap-highlight-color:rgba(0,0,0,0);-webkit-user-select:none;-webkit-font-smoothing:antialiased} #wistia_chrome_929 #wistia_grid_945_wrapper .w-css-reset-tree h2{box-sizing:inherit;box-shadow:none;color:inherit;display:block;float:none;font:inherit;font-family:inherit;font-style:normal;font-weight:normal;font-size:1.5em;letter-spacing:0;line-height:inherit;margin:0;max-height:none;max-width:none;min-height:0;min-width:0;padding:0;position:static;text-decoration:none;text-transform:none;text-shadow:none;transition:none;word-wrap:normal;-webkit-tap-highlight-color:rgba(0,0,0,0);-webkit-user-select:none;-webkit-font-smoothing:antialiased} #wistia_chrome_929 #wistia_grid_945_wrapper .w-css-reset-tree h3{box-sizing:inherit;box-shadow:none;color:inherit;display:block;float:none;font:inherit;font-family:inherit;font-style:normal;font-weight:normal;font-size:1.17em;letter-spacing:0;line-height:inherit;margin:0;max-height:none;max-width:none;min-height:0;min-width:0;padding:0;position:static;text-decoration:none;text-transform:none;text-shadow:none;transition:none;word-wrap:normal;-webkit-tap-highlight-color:rgba(0,0,0,0);-webkit-user-select:none;-webkit-font-smoothing:antialiased} #wistia_chrome_929 #wistia_grid_945_wrapper .w-css-reset-tree p{margin:1.4em 0;} #wistia_chrome_929 #wistia_grid_945_wrapper .w-css-reset-tree a{display:inline;} #wistia_chrome_929 #wistia_grid_945_wrapper .w-css-reset-tree span{display:inline;} #wistia_chrome_929 #wistia_grid_945_wrapper .w-css-reset-tree svg{display:inline;} #wistia_chrome_929 #wistia_grid_945_wrapper .w-css-reset-tree ul{box-sizing:inherit;box-shadow:none;color:inherit;display:block;float:none;font:inherit;font-family:inherit;font-style:normal;font-weight:normal;font-size:inherit;letter-spacing:0;line-height:inherit;margin:0;max-height:none;max-width:none;min-height:0;min-width:0;padding:0;position:static;text-decoration:none;text-transform:none;text-shadow:none;transition:none;word-wrap:normal;-webkit-tap-highlight-color:rgba(0,0,0,0);-webkit-user-select:none;-webkit-font-smoothing:antialiased;list-style-type:none} #wistia_chrome_929 #wistia_grid_945_wrapper .w-css-reset-tree ol{box-sizing:inherit;box-shadow:none;color:inherit;display:block;float:none;font:inherit;font-family:inherit;font-style:normal;font-weight:normal;font-size:inherit;letter-spacing:0;line-height:inherit;margin:0;max-height:none;max-width:none;min-height:0;min-width:0;padding:0;position:static;text-decoration:none;text-transform:none;text-shadow:none;transition:none;word-wrap:normal;-webkit-tap-highlight-color:rgba(0,0,0,0);-webkit-user-select:none;-webkit-font-smoothing:antialiased;list-style-type:none} #wistia_chrome_929 #wistia_grid_945_wrapper .w-css-reset-tree li{box-sizing:inherit;box-shadow:none;color:inherit;display:block;float:none;font:inherit;font-family:inherit;font-style:normal;font-weight:normal;font-size:inherit;letter-spacing:0;line-height:inherit;margin:0;max-height:none;max-width:none;min-height:0;min-width:0;padding:0;position:static;text-decoration:none;text-transform:none;text-shadow:none;transition:none;word-wrap:normal;-webkit-tap-highlight-color:rgba(0,0,0,0);-webkit-user-select:none;-webkit-font-smoothing:antialiased;list-style-type:none} #wistia_chrome_929 #wistia_grid_945_wrapper .w-css-reset-tree ul:before{display:none} #wistia_chrome_929 #wistia_grid_945_wrapper .w-css-reset-tree ol:before{display:none} #wistia_chrome_929 #wistia_grid_945_wrapper .w-css-reset-tree li:before{display:none} #wistia_chrome_929 #wistia_grid_945_wrapper .w-css-reset-tree ul:after{display:none} #wistia_chrome_929 #wistia_grid_945_wrapper .w-css-reset-tree ol:after{display:none} #wistia_chrome_929 #wistia_grid_945_wrapper .w-css-reset-tree li:after{display:none} #wistia_chrome_929 #wistia_grid_945_wrapper .w-css-reset-tree label{background-attachment:scroll;background-color:transparent;background-image:none;background-position:0 0;background-repeat:no-repeat;background-size:100% 100%;float:none;outline:none} #wistia_chrome_929 #wistia_grid_945_wrapper .w-css-reset-tree button{background-attachment:scroll;background-color:transparent;background-image:none;background-position:0 0;background-repeat:no-repeat;background-size:100% 100%;border:0;border-radius:0;outline:none;position:static} #wistia_chrome_929 #wistia_grid_945_wrapper .w-css-reset-tree img{border:0;display:inline-block;vertical-align:top;border-radius:0;outline:none;position:static} #wistia_chrome_929 #wistia_grid_945_wrapper .w-css-reset-tree button::-moz-focus-inner{border: 0;} #wistia_chrome_929 #wistia_grid_945_wrapper .w-css-reset-max-width-none-important{max-width:none!important} #wistia_chrome_929 #wistia_grid_945_wrapper .w-css-reset-button-important{border-radius:0!important;color:#fff!important;}
#wistia_grid_945_wrapper{-moz-box-sizing:content-box;-webkit-box-sizing:content-box;box-sizing:content-box;font-family:Arial,sans-serif;font-size:14px;height:100%;position:relative;text-align:left;width:100%;} #wistia_grid_945_wrapper *{-moz-box-sizing:content-box;-webkit-box-sizing:content-box;box-sizing:content-box;} #wistia_grid_945_above{position:relative;} #wistia_grid_945_main{display:block;height:100%;position:relative;} #wistia_grid_945_behind{height:100%;left:0;position:absolute;top:0;width:100%;} #wistia_grid_945_center{height:100%;overflow:hidden;position:relative;width:100%;} #wistia_grid_945_front{display:none;height:100%;left:0;position:absolute;top:0;width:100%;} #wistia_grid_945_top_inside{position:absolute;left:0;top:0;width:100%;} #wistia_grid_945_top{width:100%;position:absolute;bottom:0;left:0;} #wistia_grid_945_bottom_inside{position:absolute;left:0;bottom:0;width:100%;} #wistia_grid_945_bottom{width:100%;position:absolute;top:0;left:0;} #wistia_grid_945_left_inside{height:100%;position:absolute;left:0;top:0;} #wistia_grid_945_left{height:100%;position:absolute;right:0;top:0;} #wistia_grid_945_right_inside{height:100%;right:0;position:absolute;top:0;} #wistia_grid_945_right{height:100%;left:0;position:absolute;top:0;} #wistia_grid_945_below{position:relative;}
Default color scheme
The overall color scheme of your Payhip store is called your default color scheme. To change that, you can click Change store style > Colors > Switch default color scheme. Choose from white, light, dark, black, or highlight. Then click Save Changes.
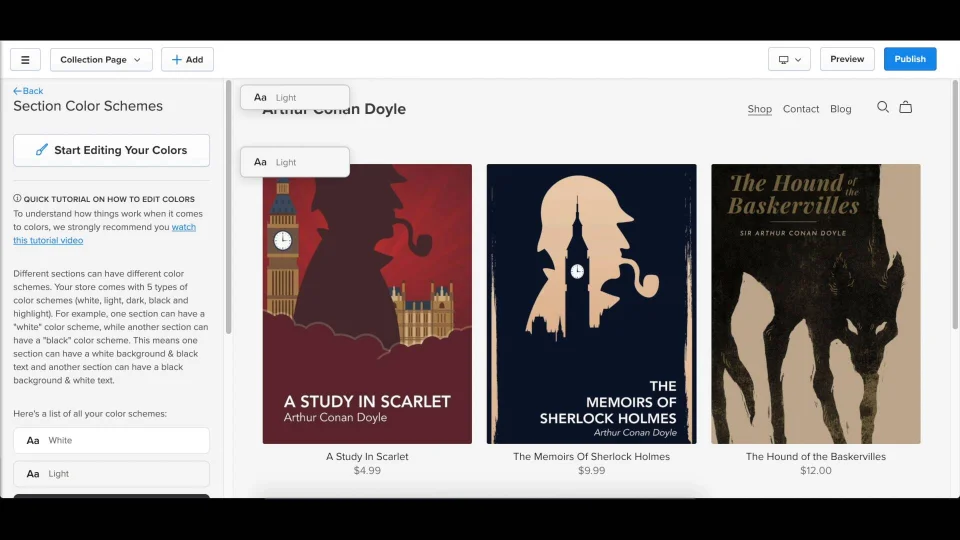
To change the colors of your default color scheme, click Start Editing Your Colors.
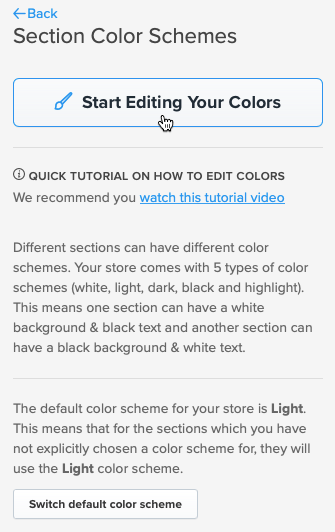
Make sure you have your default color scheme selected as the one you’d like to edit and then get creative with your colors! (Be sure to hit Save Changes when you’re done).

Click on a section in the preview window to open up the color settings for that section.
Change the color scheme of a specific section
Certain sections on a page can have a different color scheme to the default (e.g. the About Me section on the All Products page).
To update the color scheme of a specific section, click on that section over in the left-hand panel and scroll down. There you should see a Color Scheme tab, from which you can select the scheme you’d like to use. To update the colors of that color scheme, you can click the Edit button that appears.
Fonts
#wistia_chrome_938 #wistia_grid_971_wrapper .w-css-reset{font-size:14px;} #wistia_chrome_938 #wistia_grid_971_wrapper div.w-css-reset{box-sizing:inherit;box-shadow:none;color:inherit;display:block;float:none;font:inherit;font-family:inherit;font-style:normal;font-weight:normal;font-size:inherit;letter-spacing:0;line-height:inherit;margin:0;max-height:none;max-width:none;min-height:0;min-width:0;padding:0;position:static;text-decoration:none;text-transform:none;text-shadow:none;transition:none;word-wrap:normal;-webkit-tap-highlight-color:rgba(0,0,0,0);-webkit-user-select:none;-webkit-font-smoothing:antialiased} #wistia_chrome_938 #wistia_grid_971_wrapper span.w-css-reset{box-sizing:inherit;box-shadow:none;color:inherit;display:block;float:none;font:inherit;font-family:inherit;font-style:normal;font-weight:normal;font-size:inherit;letter-spacing:0;line-height:inherit;margin:0;max-height:none;max-width:none;min-height:0;min-width:0;padding:0;position:static;text-decoration:none;text-transform:none;text-shadow:none;transition:none;word-wrap:normal;-webkit-tap-highlight-color:rgba(0,0,0,0);-webkit-user-select:none;-webkit-font-smoothing:antialiased} #wistia_chrome_938 #wistia_grid_971_wrapper ul.w-css-reset{box-sizing:inherit;box-shadow:none;color:inherit;display:block;float:none;font:inherit;font-family:inherit;font-style:normal;font-weight:normal;font-size:inherit;letter-spacing:0;line-height:inherit;margin:0;max-height:none;max-width:none;min-height:0;min-width:0;padding:0;position:static;text-decoration:none;text-transform:none;text-shadow:none;transition:none;word-wrap:normal;-webkit-tap-highlight-color:rgba(0,0,0,0);-webkit-user-select:none;-webkit-font-smoothing:antialiased} #wistia_chrome_938 #wistia_grid_971_wrapper li.w-css-reset{box-sizing:inherit;box-shadow:none;color:inherit;display:block;float:none;font:inherit;font-family:inherit;font-style:normal;font-weight:normal;font-size:inherit;letter-spacing:0;line-height:inherit;margin:0;max-height:none;max-width:none;min-height:0;min-width:0;padding:0;position:static;text-decoration:none;text-transform:none;text-shadow:none;transition:none;word-wrap:normal;-webkit-tap-highlight-color:rgba(0,0,0,0);-webkit-user-select:none;-webkit-font-smoothing:antialiased} #wistia_chrome_938 #wistia_grid_971_wrapper label.w-css-reset{box-sizing:inherit;box-shadow:none;color:inherit;display:block;float:none;font:inherit;font-family:inherit;font-style:normal;font-weight:normal;font-size:inherit;letter-spacing:0;line-height:inherit;margin:0;max-height:none;max-width:none;min-height:0;min-width:0;padding:0;position:static;text-decoration:none;text-transform:none;text-shadow:none;transition:none;word-wrap:normal;-webkit-tap-highlight-color:rgba(0,0,0,0);-webkit-user-select:none;-webkit-font-smoothing:antialiased} #wistia_chrome_938 #wistia_grid_971_wrapper fieldset.w-css-reset{box-sizing:inherit;box-shadow:none;color:inherit;display:block;float:none;font:inherit;font-family:inherit;font-style:normal;font-weight:normal;font-size:inherit;letter-spacing:0;line-height:inherit;margin:0;max-height:none;max-width:none;min-height:0;min-width:0;padding:0;position:static;text-decoration:none;text-transform:none;text-shadow:none;transition:none;word-wrap:normal;-webkit-tap-highlight-color:rgba(0,0,0,0);-webkit-user-select:none;-webkit-font-smoothing:antialiased} #wistia_chrome_938 #wistia_grid_971_wrapper button.w-css-reset{box-sizing:inherit;box-shadow:none;color:inherit;display:block;float:none;font:inherit;font-family:inherit;font-style:normal;font-weight:normal;font-size:inherit;letter-spacing:0;line-height:inherit;margin:0;max-height:none;max-width:none;min-height:0;min-width:0;padding:0;position:static;text-decoration:none;text-transform:none;text-shadow:none;transition:none;word-wrap:normal;-webkit-tap-highlight-color:rgba(0,0,0,0);-webkit-user-select:none;-webkit-font-smoothing:antialiased} #wistia_chrome_938 #wistia_grid_971_wrapper img.w-css-reset{box-sizing:inherit;box-shadow:none;color:inherit;display:block;float:none;font:inherit;font-family:inherit;font-style:normal;font-weight:normal;font-size:inherit;letter-spacing:0;line-height:inherit;margin:0;max-height:none;max-width:none;min-height:0;min-width:0;padding:0;position:static;text-decoration:none;text-transform:none;text-shadow:none;transition:none;word-wrap:normal;-webkit-tap-highlight-color:rgba(0,0,0,0);-webkit-user-select:none;-webkit-font-smoothing:antialiased} #wistia_chrome_938 #wistia_grid_971_wrapper a.w-css-reset{box-sizing:inherit;box-shadow:none;color:inherit;display:block;float:none;font:inherit;font-family:inherit;font-style:normal;font-weight:normal;font-size:inherit;letter-spacing:0;line-height:inherit;margin:0;max-height:none;max-width:none;min-height:0;min-width:0;padding:0;position:static;text-decoration:none;text-transform:none;text-shadow:none;transition:none;word-wrap:normal;-webkit-tap-highlight-color:rgba(0,0,0,0);-webkit-user-select:none;-webkit-font-smoothing:antialiased} #wistia_chrome_938 #wistia_grid_971_wrapper svg.w-css-reset{box-sizing:inherit;box-shadow:none;color:inherit;display:block;float:none;font:inherit;font-family:inherit;font-style:normal;font-weight:normal;font-size:inherit;letter-spacing:0;line-height:inherit;margin:0;max-height:none;max-width:none;min-height:0;min-width:0;padding:0;position:static;text-decoration:none;text-transform:none;text-shadow:none;transition:none;word-wrap:normal;-webkit-tap-highlight-color:rgba(0,0,0,0);-webkit-user-select:none;-webkit-font-smoothing:antialiased} #wistia_chrome_938 #wistia_grid_971_wrapper p.w-css-reset{box-sizing:inherit;box-shadow:none;color:inherit;display:block;float:none;font:inherit;font-family:inherit;font-style:normal;font-weight:normal;font-size:inherit;letter-spacing:0;line-height:inherit;margin:0;max-height:none;max-width:none;min-height:0;min-width:0;padding:0;position:static;text-decoration:none;text-transform:none;text-shadow:none;transition:none;word-wrap:normal;-webkit-tap-highlight-color:rgba(0,0,0,0);-webkit-user-select:none;-webkit-font-smoothing:antialiased} #wistia_chrome_938 #wistia_grid_971_wrapper a.w-css-reset{border:0;} #wistia_chrome_938 #wistia_grid_971_wrapper h1.w-css-reset{box-sizing:inherit;box-shadow:none;color:inherit;display:block;float:none;font:inherit;font-family:inherit;font-style:normal;font-weight:normal;font-size:2em;letter-spacing:0;line-height:inherit;margin:0;max-height:none;max-width:none;min-height:0;min-width:0;padding:0;position:static;text-decoration:none;text-transform:none;text-shadow:none;transition:none;word-wrap:normal;-webkit-tap-highlight-color:rgba(0,0,0,0);-webkit-user-select:none;-webkit-font-smoothing:antialiased} #wistia_chrome_938 #wistia_grid_971_wrapper h2.w-css-reset{box-sizing:inherit;box-shadow:none;color:inherit;display:block;float:none;font:inherit;font-family:inherit;font-style:normal;font-weight:normal;font-size:1.5em;letter-spacing:0;line-height:inherit;margin:0;max-height:none;max-width:none;min-height:0;min-width:0;padding:0;position:static;text-decoration:none;text-transform:none;text-shadow:none;transition:none;word-wrap:normal;-webkit-tap-highlight-color:rgba(0,0,0,0);-webkit-user-select:none;-webkit-font-smoothing:antialiased} #wistia_chrome_938 #wistia_grid_971_wrapper h3.w-css-reset{box-sizing:inherit;box-shadow:none;color:inherit;display:block;float:none;font:inherit;font-family:inherit;font-style:normal;font-weight:normal;font-size:1.17em;letter-spacing:0;line-height:inherit;margin:0;max-height:none;max-width:none;min-height:0;min-width:0;padding:0;position:static;text-decoration:none;text-transform:none;text-shadow:none;transition:none;word-wrap:normal;-webkit-tap-highlight-color:rgba(0,0,0,0);-webkit-user-select:none;-webkit-font-smoothing:antialiased} #wistia_chrome_938 #wistia_grid_971_wrapper p.w-css-reset{margin:1.4em 0;} #wistia_chrome_938 #wistia_grid_971_wrapper a.w-css-reset{display:inline;} #wistia_chrome_938 #wistia_grid_971_wrapper span.w-css-reset{display:inline;} #wistia_chrome_938 #wistia_grid_971_wrapper svg.w-css-reset{display:inline;} #wistia_chrome_938 #wistia_grid_971_wrapper ul.w-css-reset{box-sizing:inherit;box-shadow:none;color:inherit;display:block;float:none;font:inherit;font-family:inherit;font-style:normal;font-weight:normal;font-size:inherit;letter-spacing:0;line-height:inherit;margin:0;max-height:none;max-width:none;min-height:0;min-width:0;padding:0;position:static;text-decoration:none;text-transform:none;text-shadow:none;transition:none;word-wrap:normal;-webkit-tap-highlight-color:rgba(0,0,0,0);-webkit-user-select:none;-webkit-font-smoothing:antialiased;list-style-type:none} #wistia_chrome_938 #wistia_grid_971_wrapper ol.w-css-reset{box-sizing:inherit;box-shadow:none;color:inherit;display:block;float:none;font:inherit;font-family:inherit;font-style:normal;font-weight:normal;font-size:inherit;letter-spacing:0;line-height:inherit;margin:0;max-height:none;max-width:none;min-height:0;min-width:0;padding:0;position:static;text-decoration:none;text-transform:none;text-shadow:none;transition:none;word-wrap:normal;-webkit-tap-highlight-color:rgba(0,0,0,0);-webkit-user-select:none;-webkit-font-smoothing:antialiased;list-style-type:none} #wistia_chrome_938 #wistia_grid_971_wrapper li.w-css-reset{box-sizing:inherit;box-shadow:none;color:inherit;display:block;float:none;font:inherit;font-family:inherit;font-style:normal;font-weight:normal;font-size:inherit;letter-spacing:0;line-height:inherit;margin:0;max-height:none;max-width:none;min-height:0;min-width:0;padding:0;position:static;text-decoration:none;text-transform:none;text-shadow:none;transition:none;word-wrap:normal;-webkit-tap-highlight-color:rgba(0,0,0,0);-webkit-user-select:none;-webkit-font-smoothing:antialiased;list-style-type:none} #wistia_chrome_938 #wistia_grid_971_wrapper ul:before.w-css-reset{display:none} #wistia_chrome_938 #wistia_grid_971_wrapper ol:before.w-css-reset{display:none} #wistia_chrome_938 #wistia_grid_971_wrapper li:before.w-css-reset{display:none} #wistia_chrome_938 #wistia_grid_971_wrapper ul:after.w-css-reset{display:none} #wistia_chrome_938 #wistia_grid_971_wrapper ol:after.w-css-reset{display:none} #wistia_chrome_938 #wistia_grid_971_wrapper li:after.w-css-reset{display:none} #wistia_chrome_938 #wistia_grid_971_wrapper label.w-css-reset{background-attachment:scroll;background-color:transparent;background-image:none;background-position:0 0;background-repeat:no-repeat;background-size:100% 100%;float:none;outline:none} #wistia_chrome_938 #wistia_grid_971_wrapper button.w-css-reset{background-attachment:scroll;background-color:transparent;background-image:none;background-position:0 0;background-repeat:no-repeat;background-size:100% 100%;border:0;border-radius:0;outline:none;position:static} #wistia_chrome_938 #wistia_grid_971_wrapper img.w-css-reset{border:0;display:inline-block;vertical-align:top;border-radius:0;outline:none;position:static} #wistia_chrome_938 #wistia_grid_971_wrapper .w-css-reset button::-moz-focus-inner{border: 0;} #wistia_chrome_938 #wistia_grid_971_wrapper .w-css-reset-tree {font-size:14px;} #wistia_chrome_938 #wistia_grid_971_wrapper .w-css-reset-tree div{box-sizing:inherit;box-shadow:none;color:inherit;display:block;float:none;font:inherit;font-family:inherit;font-style:normal;font-weight:normal;font-size:inherit;letter-spacing:0;line-height:inherit;margin:0;max-height:none;max-width:none;min-height:0;min-width:0;padding:0;position:static;text-decoration:none;text-transform:none;text-shadow:none;transition:none;word-wrap:normal;-webkit-tap-highlight-color:rgba(0,0,0,0);-webkit-user-select:none;-webkit-font-smoothing:antialiased} #wistia_chrome_938 #wistia_grid_971_wrapper .w-css-reset-tree span{box-sizing:inherit;box-shadow:none;color:inherit;display:block;float:none;font:inherit;font-family:inherit;font-style:normal;font-weight:normal;font-size:inherit;letter-spacing:0;line-height:inherit;margin:0;max-height:none;max-width:none;min-height:0;min-width:0;padding:0;position:static;text-decoration:none;text-transform:none;text-shadow:none;transition:none;word-wrap:normal;-webkit-tap-highlight-color:rgba(0,0,0,0);-webkit-user-select:none;-webkit-font-smoothing:antialiased} #wistia_chrome_938 #wistia_grid_971_wrapper .w-css-reset-tree ul{box-sizing:inherit;box-shadow:none;color:inherit;display:block;float:none;font:inherit;font-family:inherit;font-style:normal;font-weight:normal;font-size:inherit;letter-spacing:0;line-height:inherit;margin:0;max-height:none;max-width:none;min-height:0;min-width:0;padding:0;position:static;text-decoration:none;text-transform:none;text-shadow:none;transition:none;word-wrap:normal;-webkit-tap-highlight-color:rgba(0,0,0,0);-webkit-user-select:none;-webkit-font-smoothing:antialiased} #wistia_chrome_938 #wistia_grid_971_wrapper .w-css-reset-tree li{box-sizing:inherit;box-shadow:none;color:inherit;display:block;float:none;font:inherit;font-family:inherit;font-style:normal;font-weight:normal;font-size:inherit;letter-spacing:0;line-height:inherit;margin:0;max-height:none;max-width:none;min-height:0;min-width:0;padding:0;position:static;text-decoration:none;text-transform:none;text-shadow:none;transition:none;word-wrap:normal;-webkit-tap-highlight-color:rgba(0,0,0,0);-webkit-user-select:none;-webkit-font-smoothing:antialiased} #wistia_chrome_938 #wistia_grid_971_wrapper .w-css-reset-tree label{box-sizing:inherit;box-shadow:none;color:inherit;display:block;float:none;font:inherit;font-family:inherit;font-style:normal;font-weight:normal;font-size:inherit;letter-spacing:0;line-height:inherit;margin:0;max-height:none;max-width:none;min-height:0;min-width:0;padding:0;position:static;text-decoration:none;text-transform:none;text-shadow:none;transition:none;word-wrap:normal;-webkit-tap-highlight-color:rgba(0,0,0,0);-webkit-user-select:none;-webkit-font-smoothing:antialiased} #wistia_chrome_938 #wistia_grid_971_wrapper .w-css-reset-tree fieldset{box-sizing:inherit;box-shadow:none;color:inherit;display:block;float:none;font:inherit;font-family:inherit;font-style:normal;font-weight:normal;font-size:inherit;letter-spacing:0;line-height:inherit;margin:0;max-height:none;max-width:none;min-height:0;min-width:0;padding:0;position:static;text-decoration:none;text-transform:none;text-shadow:none;transition:none;word-wrap:normal;-webkit-tap-highlight-color:rgba(0,0,0,0);-webkit-user-select:none;-webkit-font-smoothing:antialiased} #wistia_chrome_938 #wistia_grid_971_wrapper .w-css-reset-tree button{box-sizing:inherit;box-shadow:none;color:inherit;display:block;float:none;font:inherit;font-family:inherit;font-style:normal;font-weight:normal;font-size:inherit;letter-spacing:0;line-height:inherit;margin:0;max-height:none;max-width:none;min-height:0;min-width:0;padding:0;position:static;text-decoration:none;text-transform:none;text-shadow:none;transition:none;word-wrap:normal;-webkit-tap-highlight-color:rgba(0,0,0,0);-webkit-user-select:none;-webkit-font-smoothing:antialiased} #wistia_chrome_938 #wistia_grid_971_wrapper .w-css-reset-tree img{box-sizing:inherit;box-shadow:none;color:inherit;display:block;float:none;font:inherit;font-family:inherit;font-style:normal;font-weight:normal;font-size:inherit;letter-spacing:0;line-height:inherit;margin:0;max-height:none;max-width:none;min-height:0;min-width:0;padding:0;position:static;text-decoration:none;text-transform:none;text-shadow:none;transition:none;word-wrap:normal;-webkit-tap-highlight-color:rgba(0,0,0,0);-webkit-user-select:none;-webkit-font-smoothing:antialiased} #wistia_chrome_938 #wistia_grid_971_wrapper .w-css-reset-tree a{box-sizing:inherit;box-shadow:none;color:inherit;display:block;float:none;font:inherit;font-family:inherit;font-style:normal;font-weight:normal;font-size:inherit;letter-spacing:0;line-height:inherit;margin:0;max-height:none;max-width:none;min-height:0;min-width:0;padding:0;position:static;text-decoration:none;text-transform:none;text-shadow:none;transition:none;word-wrap:normal;-webkit-tap-highlight-color:rgba(0,0,0,0);-webkit-user-select:none;-webkit-font-smoothing:antialiased} #wistia_chrome_938 #wistia_grid_971_wrapper .w-css-reset-tree svg{box-sizing:inherit;box-shadow:none;color:inherit;display:block;float:none;font:inherit;font-family:inherit;font-style:normal;font-weight:normal;font-size:inherit;letter-spacing:0;line-height:inherit;margin:0;max-height:none;max-width:none;min-height:0;min-width:0;padding:0;position:static;text-decoration:none;text-transform:none;text-shadow:none;transition:none;word-wrap:normal;-webkit-tap-highlight-color:rgba(0,0,0,0);-webkit-user-select:none;-webkit-font-smoothing:antialiased} #wistia_chrome_938 #wistia_grid_971_wrapper .w-css-reset-tree p{box-sizing:inherit;box-shadow:none;color:inherit;display:block;float:none;font:inherit;font-family:inherit;font-style:normal;font-weight:normal;font-size:inherit;letter-spacing:0;line-height:inherit;margin:0;max-height:none;max-width:none;min-height:0;min-width:0;padding:0;position:static;text-decoration:none;text-transform:none;text-shadow:none;transition:none;word-wrap:normal;-webkit-tap-highlight-color:rgba(0,0,0,0);-webkit-user-select:none;-webkit-font-smoothing:antialiased} #wistia_chrome_938 #wistia_grid_971_wrapper .w-css-reset-tree a{border:0;} #wistia_chrome_938 #wistia_grid_971_wrapper .w-css-reset-tree h1{box-sizing:inherit;box-shadow:none;color:inherit;display:block;float:none;font:inherit;font-family:inherit;font-style:normal;font-weight:normal;font-size:2em;letter-spacing:0;line-height:inherit;margin:0;max-height:none;max-width:none;min-height:0;min-width:0;padding:0;position:static;text-decoration:none;text-transform:none;text-shadow:none;transition:none;word-wrap:normal;-webkit-tap-highlight-color:rgba(0,0,0,0);-webkit-user-select:none;-webkit-font-smoothing:antialiased} #wistia_chrome_938 #wistia_grid_971_wrapper .w-css-reset-tree h2{box-sizing:inherit;box-shadow:none;color:inherit;display:block;float:none;font:inherit;font-family:inherit;font-style:normal;font-weight:normal;font-size:1.5em;letter-spacing:0;line-height:inherit;margin:0;max-height:none;max-width:none;min-height:0;min-width:0;padding:0;position:static;text-decoration:none;text-transform:none;text-shadow:none;transition:none;word-wrap:normal;-webkit-tap-highlight-color:rgba(0,0,0,0);-webkit-user-select:none;-webkit-font-smoothing:antialiased} #wistia_chrome_938 #wistia_grid_971_wrapper .w-css-reset-tree h3{box-sizing:inherit;box-shadow:none;color:inherit;display:block;float:none;font:inherit;font-family:inherit;font-style:normal;font-weight:normal;font-size:1.17em;letter-spacing:0;line-height:inherit;margin:0;max-height:none;max-width:none;min-height:0;min-width:0;padding:0;position:static;text-decoration:none;text-transform:none;text-shadow:none;transition:none;word-wrap:normal;-webkit-tap-highlight-color:rgba(0,0,0,0);-webkit-user-select:none;-webkit-font-smoothing:antialiased} #wistia_chrome_938 #wistia_grid_971_wrapper .w-css-reset-tree p{margin:1.4em 0;} #wistia_chrome_938 #wistia_grid_971_wrapper .w-css-reset-tree a{display:inline;} #wistia_chrome_938 #wistia_grid_971_wrapper .w-css-reset-tree span{display:inline;} #wistia_chrome_938 #wistia_grid_971_wrapper .w-css-reset-tree svg{display:inline;} #wistia_chrome_938 #wistia_grid_971_wrapper .w-css-reset-tree ul{box-sizing:inherit;box-shadow:none;color:inherit;display:block;float:none;font:inherit;font-family:inherit;font-style:normal;font-weight:normal;font-size:inherit;letter-spacing:0;line-height:inherit;margin:0;max-height:none;max-width:none;min-height:0;min-width:0;padding:0;position:static;text-decoration:none;text-transform:none;text-shadow:none;transition:none;word-wrap:normal;-webkit-tap-highlight-color:rgba(0,0,0,0);-webkit-user-select:none;-webkit-font-smoothing:antialiased;list-style-type:none} #wistia_chrome_938 #wistia_grid_971_wrapper .w-css-reset-tree ol{box-sizing:inherit;box-shadow:none;color:inherit;display:block;float:none;font:inherit;font-family:inherit;font-style:normal;font-weight:normal;font-size:inherit;letter-spacing:0;line-height:inherit;margin:0;max-height:none;max-width:none;min-height:0;min-width:0;padding:0;position:static;text-decoration:none;text-transform:none;text-shadow:none;transition:none;word-wrap:normal;-webkit-tap-highlight-color:rgba(0,0,0,0);-webkit-user-select:none;-webkit-font-smoothing:antialiased;list-style-type:none} #wistia_chrome_938 #wistia_grid_971_wrapper .w-css-reset-tree li{box-sizing:inherit;box-shadow:none;color:inherit;display:block;float:none;font:inherit;font-family:inherit;font-style:normal;font-weight:normal;font-size:inherit;letter-spacing:0;line-height:inherit;margin:0;max-height:none;max-width:none;min-height:0;min-width:0;padding:0;position:static;text-decoration:none;text-transform:none;text-shadow:none;transition:none;word-wrap:normal;-webkit-tap-highlight-color:rgba(0,0,0,0);-webkit-user-select:none;-webkit-font-smoothing:antialiased;list-style-type:none} #wistia_chrome_938 #wistia_grid_971_wrapper .w-css-reset-tree ul:before{display:none} #wistia_chrome_938 #wistia_grid_971_wrapper .w-css-reset-tree ol:before{display:none} #wistia_chrome_938 #wistia_grid_971_wrapper .w-css-reset-tree li:before{display:none} #wistia_chrome_938 #wistia_grid_971_wrapper .w-css-reset-tree ul:after{display:none} #wistia_chrome_938 #wistia_grid_971_wrapper .w-css-reset-tree ol:after{display:none} #wistia_chrome_938 #wistia_grid_971_wrapper .w-css-reset-tree li:after{display:none} #wistia_chrome_938 #wistia_grid_971_wrapper .w-css-reset-tree label{background-attachment:scroll;background-color:transparent;background-image:none;background-position:0 0;background-repeat:no-repeat;background-size:100% 100%;float:none;outline:none} #wistia_chrome_938 #wistia_grid_971_wrapper .w-css-reset-tree button{background-attachment:scroll;background-color:transparent;background-image:none;background-position:0 0;background-repeat:no-repeat;background-size:100% 100%;border:0;border-radius:0;outline:none;position:static} #wistia_chrome_938 #wistia_grid_971_wrapper .w-css-reset-tree img{border:0;display:inline-block;vertical-align:top;border-radius:0;outline:none;position:static} #wistia_chrome_938 #wistia_grid_971_wrapper .w-css-reset-tree button::-moz-focus-inner{border: 0;} #wistia_chrome_938 #wistia_grid_971_wrapper .w-css-reset-max-width-none-important{max-width:none!important} #wistia_chrome_938 #wistia_grid_971_wrapper .w-css-reset-button-important{border-radius:0!important;color:#fff!important;}
#wistia_grid_971_wrapper{-moz-box-sizing:content-box;-webkit-box-sizing:content-box;box-sizing:content-box;font-family:Arial,sans-serif;font-size:14px;height:100%;position:relative;text-align:left;width:100%;} #wistia_grid_971_wrapper *{-moz-box-sizing:content-box;-webkit-box-sizing:content-box;box-sizing:content-box;} #wistia_grid_971_above{position:relative;} #wistia_grid_971_main{display:block;height:100%;position:relative;} #wistia_grid_971_behind{height:100%;left:0;position:absolute;top:0;width:100%;} #wistia_grid_971_center{height:100%;overflow:hidden;position:relative;width:100%;} #wistia_grid_971_front{display:none;height:100%;left:0;position:absolute;top:0;width:100%;} #wistia_grid_971_top_inside{position:absolute;left:0;top:0;width:100%;} #wistia_grid_971_top{width:100%;position:absolute;bottom:0;left:0;} #wistia_grid_971_bottom_inside{position:absolute;left:0;bottom:0;width:100%;} #wistia_grid_971_bottom{width:100%;position:absolute;top:0;left:0;} #wistia_grid_971_left_inside{height:100%;position:absolute;left:0;top:0;} #wistia_grid_971_left{height:100%;position:absolute;right:0;top:0;} #wistia_grid_971_right_inside{height:100%;right:0;position:absolute;top:0;} #wistia_grid_971_right{height:100%;left:0;position:absolute;top:0;} #wistia_grid_971_below{position:relative;}
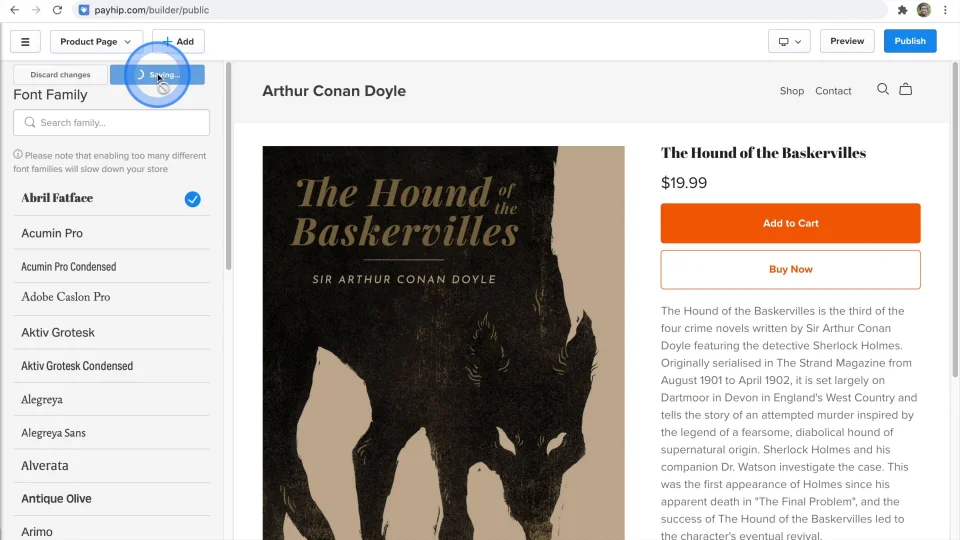
Having a font that matches your brand is an important part of how customers will perceive you. To update the font on your Payhip store, click on Change Store Style > Fonts.
You can either select from the options on the left-hand side, or click on the text that you’d like to edit in the preview window to open up its font settings.
For some of the text that you select, it will say “Synchronise with font: Miscellaneous”. This means that updating the font settings for Miscellaneous will update this text. To be able to edit the look of this text specifically, choose “Custom” instead.
Custom pages
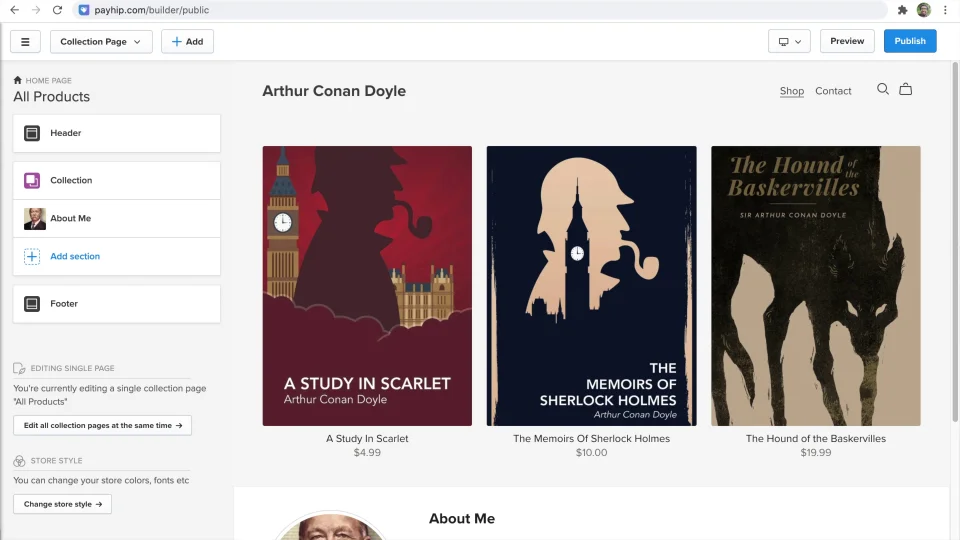
#wistia_chrome_964 #wistia_grid_993_wrapper .w-css-reset{font-size:14px;} #wistia_chrome_964 #wistia_grid_993_wrapper div.w-css-reset{box-sizing:inherit;box-shadow:none;color:inherit;display:block;float:none;font:inherit;font-family:inherit;font-style:normal;font-weight:normal;font-size:inherit;letter-spacing:0;line-height:inherit;margin:0;max-height:none;max-width:none;min-height:0;min-width:0;padding:0;position:static;text-decoration:none;text-transform:none;text-shadow:none;transition:none;word-wrap:normal;-webkit-tap-highlight-color:rgba(0,0,0,0);-webkit-user-select:none;-webkit-font-smoothing:antialiased} #wistia_chrome_964 #wistia_grid_993_wrapper span.w-css-reset{box-sizing:inherit;box-shadow:none;color:inherit;display:block;float:none;font:inherit;font-family:inherit;font-style:normal;font-weight:normal;font-size:inherit;letter-spacing:0;line-height:inherit;margin:0;max-height:none;max-width:none;min-height:0;min-width:0;padding:0;position:static;text-decoration:none;text-transform:none;text-shadow:none;transition:none;word-wrap:normal;-webkit-tap-highlight-color:rgba(0,0,0,0);-webkit-user-select:none;-webkit-font-smoothing:antialiased} #wistia_chrome_964 #wistia_grid_993_wrapper ul.w-css-reset{box-sizing:inherit;box-shadow:none;color:inherit;display:block;float:none;font:inherit;font-family:inherit;font-style:normal;font-weight:normal;font-size:inherit;letter-spacing:0;line-height:inherit;margin:0;max-height:none;max-width:none;min-height:0;min-width:0;padding:0;position:static;text-decoration:none;text-transform:none;text-shadow:none;transition:none;word-wrap:normal;-webkit-tap-highlight-color:rgba(0,0,0,0);-webkit-user-select:none;-webkit-font-smoothing:antialiased} #wistia_chrome_964 #wistia_grid_993_wrapper li.w-css-reset{box-sizing:inherit;box-shadow:none;color:inherit;display:block;float:none;font:inherit;font-family:inherit;font-style:normal;font-weight:normal;font-size:inherit;letter-spacing:0;line-height:inherit;margin:0;max-height:none;max-width:none;min-height:0;min-width:0;padding:0;position:static;text-decoration:none;text-transform:none;text-shadow:none;transition:none;word-wrap:normal;-webkit-tap-highlight-color:rgba(0,0,0,0);-webkit-user-select:none;-webkit-font-smoothing:antialiased} #wistia_chrome_964 #wistia_grid_993_wrapper label.w-css-reset{box-sizing:inherit;box-shadow:none;color:inherit;display:block;float:none;font:inherit;font-family:inherit;font-style:normal;font-weight:normal;font-size:inherit;letter-spacing:0;line-height:inherit;margin:0;max-height:none;max-width:none;min-height:0;min-width:0;padding:0;position:static;text-decoration:none;text-transform:none;text-shadow:none;transition:none;word-wrap:normal;-webkit-tap-highlight-color:rgba(0,0,0,0);-webkit-user-select:none;-webkit-font-smoothing:antialiased} #wistia_chrome_964 #wistia_grid_993_wrapper fieldset.w-css-reset{box-sizing:inherit;box-shadow:none;color:inherit;display:block;float:none;font:inherit;font-family:inherit;font-style:normal;font-weight:normal;font-size:inherit;letter-spacing:0;line-height:inherit;margin:0;max-height:none;max-width:none;min-height:0;min-width:0;padding:0;position:static;text-decoration:none;text-transform:none;text-shadow:none;transition:none;word-wrap:normal;-webkit-tap-highlight-color:rgba(0,0,0,0);-webkit-user-select:none;-webkit-font-smoothing:antialiased} #wistia_chrome_964 #wistia_grid_993_wrapper button.w-css-reset{box-sizing:inherit;box-shadow:none;color:inherit;display:block;float:none;font:inherit;font-family:inherit;font-style:normal;font-weight:normal;font-size:inherit;letter-spacing:0;line-height:inherit;margin:0;max-height:none;max-width:none;min-height:0;min-width:0;padding:0;position:static;text-decoration:none;text-transform:none;text-shadow:none;transition:none;word-wrap:normal;-webkit-tap-highlight-color:rgba(0,0,0,0);-webkit-user-select:none;-webkit-font-smoothing:antialiased} #wistia_chrome_964 #wistia_grid_993_wrapper img.w-css-reset{box-sizing:inherit;box-shadow:none;color:inherit;display:block;float:none;font:inherit;font-family:inherit;font-style:normal;font-weight:normal;font-size:inherit;letter-spacing:0;line-height:inherit;margin:0;max-height:none;max-width:none;min-height:0;min-width:0;padding:0;position:static;text-decoration:none;text-transform:none;text-shadow:none;transition:none;word-wrap:normal;-webkit-tap-highlight-color:rgba(0,0,0,0);-webkit-user-select:none;-webkit-font-smoothing:antialiased} #wistia_chrome_964 #wistia_grid_993_wrapper a.w-css-reset{box-sizing:inherit;box-shadow:none;color:inherit;display:block;float:none;font:inherit;font-family:inherit;font-style:normal;font-weight:normal;font-size:inherit;letter-spacing:0;line-height:inherit;margin:0;max-height:none;max-width:none;min-height:0;min-width:0;padding:0;position:static;text-decoration:none;text-transform:none;text-shadow:none;transition:none;word-wrap:normal;-webkit-tap-highlight-color:rgba(0,0,0,0);-webkit-user-select:none;-webkit-font-smoothing:antialiased} #wistia_chrome_964 #wistia_grid_993_wrapper svg.w-css-reset{box-sizing:inherit;box-shadow:none;color:inherit;display:block;float:none;font:inherit;font-family:inherit;font-style:normal;font-weight:normal;font-size:inherit;letter-spacing:0;line-height:inherit;margin:0;max-height:none;max-width:none;min-height:0;min-width:0;padding:0;position:static;text-decoration:none;text-transform:none;text-shadow:none;transition:none;word-wrap:normal;-webkit-tap-highlight-color:rgba(0,0,0,0);-webkit-user-select:none;-webkit-font-smoothing:antialiased} #wistia_chrome_964 #wistia_grid_993_wrapper p.w-css-reset{box-sizing:inherit;box-shadow:none;color:inherit;display:block;float:none;font:inherit;font-family:inherit;font-style:normal;font-weight:normal;font-size:inherit;letter-spacing:0;line-height:inherit;margin:0;max-height:none;max-width:none;min-height:0;min-width:0;padding:0;position:static;text-decoration:none;text-transform:none;text-shadow:none;transition:none;word-wrap:normal;-webkit-tap-highlight-color:rgba(0,0,0,0);-webkit-user-select:none;-webkit-font-smoothing:antialiased} #wistia_chrome_964 #wistia_grid_993_wrapper a.w-css-reset{border:0;} #wistia_chrome_964 #wistia_grid_993_wrapper h1.w-css-reset{box-sizing:inherit;box-shadow:none;color:inherit;display:block;float:none;font:inherit;font-family:inherit;font-style:normal;font-weight:normal;font-size:2em;letter-spacing:0;line-height:inherit;margin:0;max-height:none;max-width:none;min-height:0;min-width:0;padding:0;position:static;text-decoration:none;text-transform:none;text-shadow:none;transition:none;word-wrap:normal;-webkit-tap-highlight-color:rgba(0,0,0,0);-webkit-user-select:none;-webkit-font-smoothing:antialiased} #wistia_chrome_964 #wistia_grid_993_wrapper h2.w-css-reset{box-sizing:inherit;box-shadow:none;color:inherit;display:block;float:none;font:inherit;font-family:inherit;font-style:normal;font-weight:normal;font-size:1.5em;letter-spacing:0;line-height:inherit;margin:0;max-height:none;max-width:none;min-height:0;min-width:0;padding:0;position:static;text-decoration:none;text-transform:none;text-shadow:none;transition:none;word-wrap:normal;-webkit-tap-highlight-color:rgba(0,0,0,0);-webkit-user-select:none;-webkit-font-smoothing:antialiased} #wistia_chrome_964 #wistia_grid_993_wrapper h3.w-css-reset{box-sizing:inherit;box-shadow:none;color:inherit;display:block;float:none;font:inherit;font-family:inherit;font-style:normal;font-weight:normal;font-size:1.17em;letter-spacing:0;line-height:inherit;margin:0;max-height:none;max-width:none;min-height:0;min-width:0;padding:0;position:static;text-decoration:none;text-transform:none;text-shadow:none;transition:none;word-wrap:normal;-webkit-tap-highlight-color:rgba(0,0,0,0);-webkit-user-select:none;-webkit-font-smoothing:antialiased} #wistia_chrome_964 #wistia_grid_993_wrapper p.w-css-reset{margin:1.4em 0;} #wistia_chrome_964 #wistia_grid_993_wrapper a.w-css-reset{display:inline;} #wistia_chrome_964 #wistia_grid_993_wrapper span.w-css-reset{display:inline;} #wistia_chrome_964 #wistia_grid_993_wrapper svg.w-css-reset{display:inline;} #wistia_chrome_964 #wistia_grid_993_wrapper ul.w-css-reset{box-sizing:inherit;box-shadow:none;color:inherit;display:block;float:none;font:inherit;font-family:inherit;font-style:normal;font-weight:normal;font-size:inherit;letter-spacing:0;line-height:inherit;margin:0;max-height:none;max-width:none;min-height:0;min-width:0;padding:0;position:static;text-decoration:none;text-transform:none;text-shadow:none;transition:none;word-wrap:normal;-webkit-tap-highlight-color:rgba(0,0,0,0);-webkit-user-select:none;-webkit-font-smoothing:antialiased;list-style-type:none} #wistia_chrome_964 #wistia_grid_993_wrapper ol.w-css-reset{box-sizing:inherit;box-shadow:none;color:inherit;display:block;float:none;font:inherit;font-family:inherit;font-style:normal;font-weight:normal;font-size:inherit;letter-spacing:0;line-height:inherit;margin:0;max-height:none;max-width:none;min-height:0;min-width:0;padding:0;position:static;text-decoration:none;text-transform:none;text-shadow:none;transition:none;word-wrap:normal;-webkit-tap-highlight-color:rgba(0,0,0,0);-webkit-user-select:none;-webkit-font-smoothing:antialiased;list-style-type:none} #wistia_chrome_964 #wistia_grid_993_wrapper li.w-css-reset{box-sizing:inherit;box-shadow:none;color:inherit;display:block;float:none;font:inherit;font-family:inherit;font-style:normal;font-weight:normal;font-size:inherit;letter-spacing:0;line-height:inherit;margin:0;max-height:none;max-width:none;min-height:0;min-width:0;padding:0;position:static;text-decoration:none;text-transform:none;text-shadow:none;transition:none;word-wrap:normal;-webkit-tap-highlight-color:rgba(0,0,0,0);-webkit-user-select:none;-webkit-font-smoothing:antialiased;list-style-type:none} #wistia_chrome_964 #wistia_grid_993_wrapper ul:before.w-css-reset{display:none} #wistia_chrome_964 #wistia_grid_993_wrapper ol:before.w-css-reset{display:none} #wistia_chrome_964 #wistia_grid_993_wrapper li:before.w-css-reset{display:none} #wistia_chrome_964 #wistia_grid_993_wrapper ul:after.w-css-reset{display:none} #wistia_chrome_964 #wistia_grid_993_wrapper ol:after.w-css-reset{display:none} #wistia_chrome_964 #wistia_grid_993_wrapper li:after.w-css-reset{display:none} #wistia_chrome_964 #wistia_grid_993_wrapper label.w-css-reset{background-attachment:scroll;background-color:transparent;background-image:none;background-position:0 0;background-repeat:no-repeat;background-size:100% 100%;float:none;outline:none} #wistia_chrome_964 #wistia_grid_993_wrapper button.w-css-reset{background-attachment:scroll;background-color:transparent;background-image:none;background-position:0 0;background-repeat:no-repeat;background-size:100% 100%;border:0;border-radius:0;outline:none;position:static} #wistia_chrome_964 #wistia_grid_993_wrapper img.w-css-reset{border:0;display:inline-block;vertical-align:top;border-radius:0;outline:none;position:static} #wistia_chrome_964 #wistia_grid_993_wrapper .w-css-reset button::-moz-focus-inner{border: 0;} #wistia_chrome_964 #wistia_grid_993_wrapper .w-css-reset-tree {font-size:14px;} #wistia_chrome_964 #wistia_grid_993_wrapper .w-css-reset-tree div{box-sizing:inherit;box-shadow:none;color:inherit;display:block;float:none;font:inherit;font-family:inherit;font-style:normal;font-weight:normal;font-size:inherit;letter-spacing:0;line-height:inherit;margin:0;max-height:none;max-width:none;min-height:0;min-width:0;padding:0;position:static;text-decoration:none;text-transform:none;text-shadow:none;transition:none;word-wrap:normal;-webkit-tap-highlight-color:rgba(0,0,0,0);-webkit-user-select:none;-webkit-font-smoothing:antialiased} #wistia_chrome_964 #wistia_grid_993_wrapper .w-css-reset-tree span{box-sizing:inherit;box-shadow:none;color:inherit;display:block;float:none;font:inherit;font-family:inherit;font-style:normal;font-weight:normal;font-size:inherit;letter-spacing:0;line-height:inherit;margin:0;max-height:none;max-width:none;min-height:0;min-width:0;padding:0;position:static;text-decoration:none;text-transform:none;text-shadow:none;transition:none;word-wrap:normal;-webkit-tap-highlight-color:rgba(0,0,0,0);-webkit-user-select:none;-webkit-font-smoothing:antialiased} #wistia_chrome_964 #wistia_grid_993_wrapper .w-css-reset-tree ul{box-sizing:inherit;box-shadow:none;color:inherit;display:block;float:none;font:inherit;font-family:inherit;font-style:normal;font-weight:normal;font-size:inherit;letter-spacing:0;line-height:inherit;margin:0;max-height:none;max-width:none;min-height:0;min-width:0;padding:0;position:static;text-decoration:none;text-transform:none;text-shadow:none;transition:none;word-wrap:normal;-webkit-tap-highlight-color:rgba(0,0,0,0);-webkit-user-select:none;-webkit-font-smoothing:antialiased} #wistia_chrome_964 #wistia_grid_993_wrapper .w-css-reset-tree li{box-sizing:inherit;box-shadow:none;color:inherit;display:block;float:none;font:inherit;font-family:inherit;font-style:normal;font-weight:normal;font-size:inherit;letter-spacing:0;line-height:inherit;margin:0;max-height:none;max-width:none;min-height:0;min-width:0;padding:0;position:static;text-decoration:none;text-transform:none;text-shadow:none;transition:none;word-wrap:normal;-webkit-tap-highlight-color:rgba(0,0,0,0);-webkit-user-select:none;-webkit-font-smoothing:antialiased} #wistia_chrome_964 #wistia_grid_993_wrapper .w-css-reset-tree label{box-sizing:inherit;box-shadow:none;color:inherit;display:block;float:none;font:inherit;font-family:inherit;font-style:normal;font-weight:normal;font-size:inherit;letter-spacing:0;line-height:inherit;margin:0;max-height:none;max-width:none;min-height:0;min-width:0;padding:0;position:static;text-decoration:none;text-transform:none;text-shadow:none;transition:none;word-wrap:normal;-webkit-tap-highlight-color:rgba(0,0,0,0);-webkit-user-select:none;-webkit-font-smoothing:antialiased} #wistia_chrome_964 #wistia_grid_993_wrapper .w-css-reset-tree fieldset{box-sizing:inherit;box-shadow:none;color:inherit;display:block;float:none;font:inherit;font-family:inherit;font-style:normal;font-weight:normal;font-size:inherit;letter-spacing:0;line-height:inherit;margin:0;max-height:none;max-width:none;min-height:0;min-width:0;padding:0;position:static;text-decoration:none;text-transform:none;text-shadow:none;transition:none;word-wrap:normal;-webkit-tap-highlight-color:rgba(0,0,0,0);-webkit-user-select:none;-webkit-font-smoothing:antialiased} #wistia_chrome_964 #wistia_grid_993_wrapper .w-css-reset-tree button{box-sizing:inherit;box-shadow:none;color:inherit;display:block;float:none;font:inherit;font-family:inherit;font-style:normal;font-weight:normal;font-size:inherit;letter-spacing:0;line-height:inherit;margin:0;max-height:none;max-width:none;min-height:0;min-width:0;padding:0;position:static;text-decoration:none;text-transform:none;text-shadow:none;transition:none;word-wrap:normal;-webkit-tap-highlight-color:rgba(0,0,0,0);-webkit-user-select:none;-webkit-font-smoothing:antialiased} #wistia_chrome_964 #wistia_grid_993_wrapper .w-css-reset-tree img{box-sizing:inherit;box-shadow:none;color:inherit;display:block;float:none;font:inherit;font-family:inherit;font-style:normal;font-weight:normal;font-size:inherit;letter-spacing:0;line-height:inherit;margin:0;max-height:none;max-width:none;min-height:0;min-width:0;padding:0;position:static;text-decoration:none;text-transform:none;text-shadow:none;transition:none;word-wrap:normal;-webkit-tap-highlight-color:rgba(0,0,0,0);-webkit-user-select:none;-webkit-font-smoothing:antialiased} #wistia_chrome_964 #wistia_grid_993_wrapper .w-css-reset-tree a{box-sizing:inherit;box-shadow:none;color:inherit;display:block;float:none;font:inherit;font-family:inherit;font-style:normal;font-weight:normal;font-size:inherit;letter-spacing:0;line-height:inherit;margin:0;max-height:none;max-width:none;min-height:0;min-width:0;padding:0;position:static;text-decoration:none;text-transform:none;text-shadow:none;transition:none;word-wrap:normal;-webkit-tap-highlight-color:rgba(0,0,0,0);-webkit-user-select:none;-webkit-font-smoothing:antialiased} #wistia_chrome_964 #wistia_grid_993_wrapper .w-css-reset-tree svg{box-sizing:inherit;box-shadow:none;color:inherit;display:block;float:none;font:inherit;font-family:inherit;font-style:normal;font-weight:normal;font-size:inherit;letter-spacing:0;line-height:inherit;margin:0;max-height:none;max-width:none;min-height:0;min-width:0;padding:0;position:static;text-decoration:none;text-transform:none;text-shadow:none;transition:none;word-wrap:normal;-webkit-tap-highlight-color:rgba(0,0,0,0);-webkit-user-select:none;-webkit-font-smoothing:antialiased} #wistia_chrome_964 #wistia_grid_993_wrapper .w-css-reset-tree p{box-sizing:inherit;box-shadow:none;color:inherit;display:block;float:none;font:inherit;font-family:inherit;font-style:normal;font-weight:normal;font-size:inherit;letter-spacing:0;line-height:inherit;margin:0;max-height:none;max-width:none;min-height:0;min-width:0;padding:0;position:static;text-decoration:none;text-transform:none;text-shadow:none;transition:none;word-wrap:normal;-webkit-tap-highlight-color:rgba(0,0,0,0);-webkit-user-select:none;-webkit-font-smoothing:antialiased} #wistia_chrome_964 #wistia_grid_993_wrapper .w-css-reset-tree a{border:0;} #wistia_chrome_964 #wistia_grid_993_wrapper .w-css-reset-tree h1{box-sizing:inherit;box-shadow:none;color:inherit;display:block;float:none;font:inherit;font-family:inherit;font-style:normal;font-weight:normal;font-size:2em;letter-spacing:0;line-height:inherit;margin:0;max-height:none;max-width:none;min-height:0;min-width:0;padding:0;position:static;text-decoration:none;text-transform:none;text-shadow:none;transition:none;word-wrap:normal;-webkit-tap-highlight-color:rgba(0,0,0,0);-webkit-user-select:none;-webkit-font-smoothing:antialiased} #wistia_chrome_964 #wistia_grid_993_wrapper .w-css-reset-tree h2{box-sizing:inherit;box-shadow:none;color:inherit;display:block;float:none;font:inherit;font-family:inherit;font-style:normal;font-weight:normal;font-size:1.5em;letter-spacing:0;line-height:inherit;margin:0;max-height:none;max-width:none;min-height:0;min-width:0;padding:0;position:static;text-decoration:none;text-transform:none;text-shadow:none;transition:none;word-wrap:normal;-webkit-tap-highlight-color:rgba(0,0,0,0);-webkit-user-select:none;-webkit-font-smoothing:antialiased} #wistia_chrome_964 #wistia_grid_993_wrapper .w-css-reset-tree h3{box-sizing:inherit;box-shadow:none;color:inherit;display:block;float:none;font:inherit;font-family:inherit;font-style:normal;font-weight:normal;font-size:1.17em;letter-spacing:0;line-height:inherit;margin:0;max-height:none;max-width:none;min-height:0;min-width:0;padding:0;position:static;text-decoration:none;text-transform:none;text-shadow:none;transition:none;word-wrap:normal;-webkit-tap-highlight-color:rgba(0,0,0,0);-webkit-user-select:none;-webkit-font-smoothing:antialiased} #wistia_chrome_964 #wistia_grid_993_wrapper .w-css-reset-tree p{margin:1.4em 0;} #wistia_chrome_964 #wistia_grid_993_wrapper .w-css-reset-tree a{display:inline;} #wistia_chrome_964 #wistia_grid_993_wrapper .w-css-reset-tree span{display:inline;} #wistia_chrome_964 #wistia_grid_993_wrapper .w-css-reset-tree svg{display:inline;} #wistia_chrome_964 #wistia_grid_993_wrapper .w-css-reset-tree ul{box-sizing:inherit;box-shadow:none;color:inherit;display:block;float:none;font:inherit;font-family:inherit;font-style:normal;font-weight:normal;font-size:inherit;letter-spacing:0;line-height:inherit;margin:0;max-height:none;max-width:none;min-height:0;min-width:0;padding:0;position:static;text-decoration:none;text-transform:none;text-shadow:none;transition:none;word-wrap:normal;-webkit-tap-highlight-color:rgba(0,0,0,0);-webkit-user-select:none;-webkit-font-smoothing:antialiased;list-style-type:none} #wistia_chrome_964 #wistia_grid_993_wrapper .w-css-reset-tree ol{box-sizing:inherit;box-shadow:none;color:inherit;display:block;float:none;font:inherit;font-family:inherit;font-style:normal;font-weight:normal;font-size:inherit;letter-spacing:0;line-height:inherit;margin:0;max-height:none;max-width:none;min-height:0;min-width:0;padding:0;position:static;text-decoration:none;text-transform:none;text-shadow:none;transition:none;word-wrap:normal;-webkit-tap-highlight-color:rgba(0,0,0,0);-webkit-user-select:none;-webkit-font-smoothing:antialiased;list-style-type:none} #wistia_chrome_964 #wistia_grid_993_wrapper .w-css-reset-tree li{box-sizing:inherit;box-shadow:none;color:inherit;display:block;float:none;font:inherit;font-family:inherit;font-style:normal;font-weight:normal;font-size:inherit;letter-spacing:0;line-height:inherit;margin:0;max-height:none;max-width:none;min-height:0;min-width:0;padding:0;position:static;text-decoration:none;text-transform:none;text-shadow:none;transition:none;word-wrap:normal;-webkit-tap-highlight-color:rgba(0,0,0,0);-webkit-user-select:none;-webkit-font-smoothing:antialiased;list-style-type:none} #wistia_chrome_964 #wistia_grid_993_wrapper .w-css-reset-tree ul:before{display:none} #wistia_chrome_964 #wistia_grid_993_wrapper .w-css-reset-tree ol:before{display:none} #wistia_chrome_964 #wistia_grid_993_wrapper .w-css-reset-tree li:before{display:none} #wistia_chrome_964 #wistia_grid_993_wrapper .w-css-reset-tree ul:after{display:none} #wistia_chrome_964 #wistia_grid_993_wrapper .w-css-reset-tree ol:after{display:none} #wistia_chrome_964 #wistia_grid_993_wrapper .w-css-reset-tree li:after{display:none} #wistia_chrome_964 #wistia_grid_993_wrapper .w-css-reset-tree label{background-attachment:scroll;background-color:transparent;background-image:none;background-position:0 0;background-repeat:no-repeat;background-size:100% 100%;float:none;outline:none} #wistia_chrome_964 #wistia_grid_993_wrapper .w-css-reset-tree button{background-attachment:scroll;background-color:transparent;background-image:none;background-position:0 0;background-repeat:no-repeat;background-size:100% 100%;border:0;border-radius:0;outline:none;position:static} #wistia_chrome_964 #wistia_grid_993_wrapper .w-css-reset-tree img{border:0;display:inline-block;vertical-align:top;border-radius:0;outline:none;position:static} #wistia_chrome_964 #wistia_grid_993_wrapper .w-css-reset-tree button::-moz-focus-inner{border: 0;} #wistia_chrome_964 #wistia_grid_993_wrapper .w-css-reset-max-width-none-important{max-width:none!important} #wistia_chrome_964 #wistia_grid_993_wrapper .w-css-reset-button-important{border-radius:0!important;color:#fff!important;}
#wistia_grid_993_wrapper{-moz-box-sizing:content-box;-webkit-box-sizing:content-box;box-sizing:content-box;font-family:Arial,sans-serif;font-size:14px;height:100%;position:relative;text-align:left;width:100%;} #wistia_grid_993_wrapper *{-moz-box-sizing:content-box;-webkit-box-sizing:content-box;box-sizing:content-box;} #wistia_grid_993_above{position:relative;} #wistia_grid_993_main{display:block;height:100%;position:relative;} #wistia_grid_993_behind{height:100%;left:0;position:absolute;top:0;width:100%;} #wistia_grid_993_center{height:100%;overflow:hidden;position:relative;width:100%;} #wistia_grid_993_front{display:none;height:100%;left:0;position:absolute;top:0;width:100%;} #wistia_grid_993_top_inside{position:absolute;left:0;top:0;width:100%;} #wistia_grid_993_top{width:100%;position:absolute;bottom:0;left:0;} #wistia_grid_993_bottom_inside{position:absolute;left:0;bottom:0;width:100%;} #wistia_grid_993_bottom{width:100%;position:absolute;top:0;left:0;} #wistia_grid_993_left_inside{height:100%;position:absolute;left:0;top:0;} #wistia_grid_993_left{height:100%;position:absolute;right:0;top:0;} #wistia_grid_993_right_inside{height:100%;right:0;position:absolute;top:0;} #wistia_grid_993_right{height:100%;left:0;position:absolute;top:0;} #wistia_grid_993_below{position:relative;}
The store builder allows you to add any extra pages that you need to your Payhip store (e.g. an FAQ). To add a new page, click the Add button at the top left of the screen and choose Custom Page.
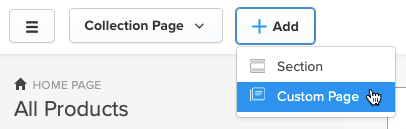
Then type in a title for your page and hit Add. You can then start adding sections to your page!
Page settings
You have some additional options for custom pages, which you can access by clicking on the cog icon for the page.
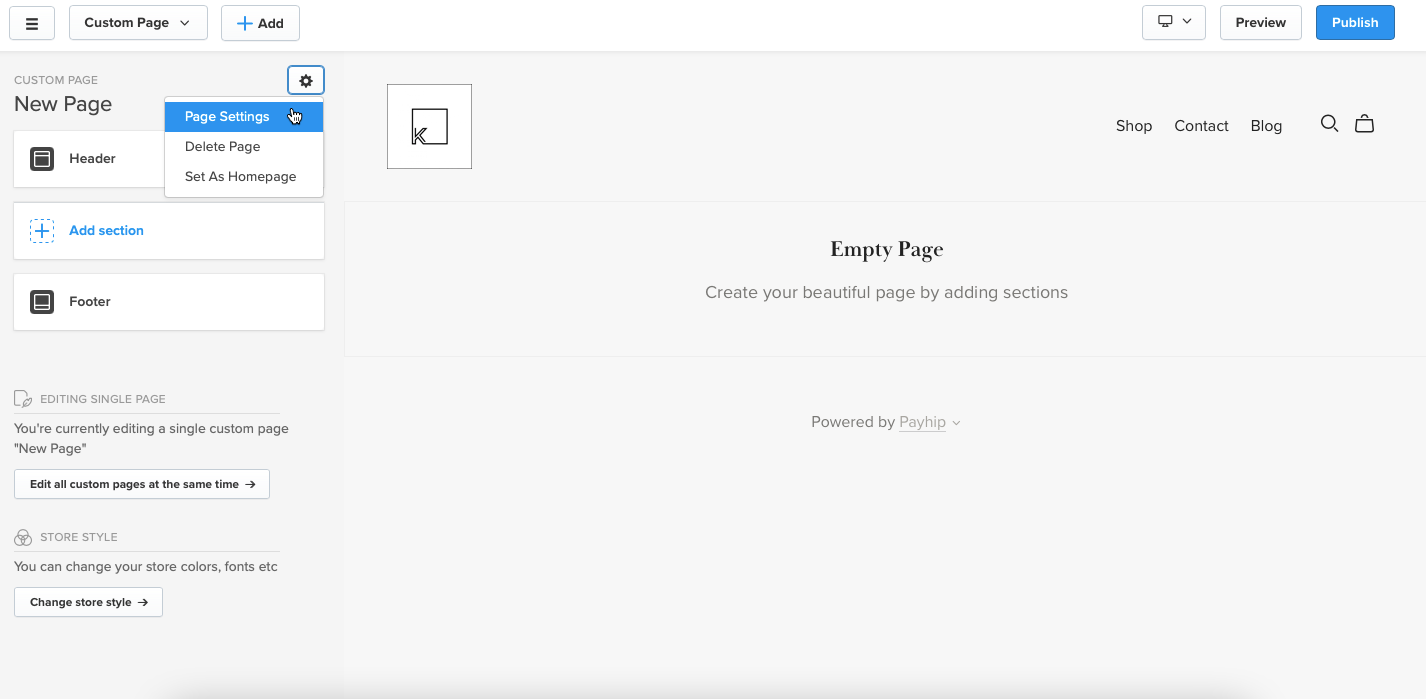
This will open up a modal with a few different tabs:
- General - Update the page title, URL, and visibility (make it invisible if you want to work on the page before publishing it).
- SEO - Specify an SEO title and description that will be used when the page shows up in search engine results.
- Social Media - Change the image that appears when your page is shared on social media.
Add navigational links
If you've added a blog or a custom page to your Payhip store, then you'll want to add a link to it in your site header so that visitors can find it.
To do that, from the store builder click Header followed by Navigation Links > Edit Navigation Links. Then click + Add Link.
Next, choose the name of the link (this will appear in the navbar) and select which page you'd like to link to. You can link to another page in your Payhip store, or enter a URL to link to an external page. Click Add Navigation Link when you're done.
#wistia_chrome_1012 #wistia_grid_1019_wrapper .w-css-reset{font-size:14px;} #wistia_chrome_1012 #wistia_grid_1019_wrapper div.w-css-reset{box-sizing:inherit;box-shadow:none;color:inherit;display:block;float:none;font:inherit;font-family:inherit;font-style:normal;font-weight:normal;font-size:inherit;letter-spacing:0;line-height:inherit;margin:0;max-height:none;max-width:none;min-height:0;min-width:0;padding:0;position:static;text-decoration:none;text-transform:none;text-shadow:none;transition:none;word-wrap:normal;-webkit-tap-highlight-color:rgba(0,0,0,0);-webkit-user-select:none;-webkit-font-smoothing:antialiased} #wistia_chrome_1012 #wistia_grid_1019_wrapper span.w-css-reset{box-sizing:inherit;box-shadow:none;color:inherit;display:block;float:none;font:inherit;font-family:inherit;font-style:normal;font-weight:normal;font-size:inherit;letter-spacing:0;line-height:inherit;margin:0;max-height:none;max-width:none;min-height:0;min-width:0;padding:0;position:static;text-decoration:none;text-transform:none;text-shadow:none;transition:none;word-wrap:normal;-webkit-tap-highlight-color:rgba(0,0,0,0);-webkit-user-select:none;-webkit-font-smoothing:antialiased} #wistia_chrome_1012 #wistia_grid_1019_wrapper ul.w-css-reset{box-sizing:inherit;box-shadow:none;color:inherit;display:block;float:none;font:inherit;font-family:inherit;font-style:normal;font-weight:normal;font-size:inherit;letter-spacing:0;line-height:inherit;margin:0;max-height:none;max-width:none;min-height:0;min-width:0;padding:0;position:static;text-decoration:none;text-transform:none;text-shadow:none;transition:none;word-wrap:normal;-webkit-tap-highlight-color:rgba(0,0,0,0);-webkit-user-select:none;-webkit-font-smoothing:antialiased} #wistia_chrome_1012 #wistia_grid_1019_wrapper li.w-css-reset{box-sizing:inherit;box-shadow:none;color:inherit;display:block;float:none;font:inherit;font-family:inherit;font-style:normal;font-weight:normal;font-size:inherit;letter-spacing:0;line-height:inherit;margin:0;max-height:none;max-width:none;min-height:0;min-width:0;padding:0;position:static;text-decoration:none;text-transform:none;text-shadow:none;transition:none;word-wrap:normal;-webkit-tap-highlight-color:rgba(0,0,0,0);-webkit-user-select:none;-webkit-font-smoothing:antialiased} #wistia_chrome_1012 #wistia_grid_1019_wrapper label.w-css-reset{box-sizing:inherit;box-shadow:none;color:inherit;display:block;float:none;font:inherit;font-family:inherit;font-style:normal;font-weight:normal;font-size:inherit;letter-spacing:0;line-height:inherit;margin:0;max-height:none;max-width:none;min-height:0;min-width:0;padding:0;position:static;text-decoration:none;text-transform:none;text-shadow:none;transition:none;word-wrap:normal;-webkit-tap-highlight-color:rgba(0,0,0,0);-webkit-user-select:none;-webkit-font-smoothing:antialiased} #wistia_chrome_1012 #wistia_grid_1019_wrapper fieldset.w-css-reset{box-sizing:inherit;box-shadow:none;color:inherit;display:block;float:none;font:inherit;font-family:inherit;font-style:normal;font-weight:normal;font-size:inherit;letter-spacing:0;line-height:inherit;margin:0;max-height:none;max-width:none;min-height:0;min-width:0;padding:0;position:static;text-decoration:none;text-transform:none;text-shadow:none;transition:none;word-wrap:normal;-webkit-tap-highlight-color:rgba(0,0,0,0);-webkit-user-select:none;-webkit-font-smoothing:antialiased} #wistia_chrome_1012 #wistia_grid_1019_wrapper button.w-css-reset{box-sizing:inherit;box-shadow:none;color:inherit;display:block;float:none;font:inherit;font-family:inherit;font-style:normal;font-weight:normal;font-size:inherit;letter-spacing:0;line-height:inherit;margin:0;max-height:none;max-width:none;min-height:0;min-width:0;padding:0;position:static;text-decoration:none;text-transform:none;text-shadow:none;transition:none;word-wrap:normal;-webkit-tap-highlight-color:rgba(0,0,0,0);-webkit-user-select:none;-webkit-font-smoothing:antialiased} #wistia_chrome_1012 #wistia_grid_1019_wrapper img.w-css-reset{box-sizing:inherit;box-shadow:none;color:inherit;display:block;float:none;font:inherit;font-family:inherit;font-style:normal;font-weight:normal;font-size:inherit;letter-spacing:0;line-height:inherit;margin:0;max-height:none;max-width:none;min-height:0;min-width:0;padding:0;position:static;text-decoration:none;text-transform:none;text-shadow:none;transition:none;word-wrap:normal;-webkit-tap-highlight-color:rgba(0,0,0,0);-webkit-user-select:none;-webkit-font-smoothing:antialiased} #wistia_chrome_1012 #wistia_grid_1019_wrapper a.w-css-reset{box-sizing:inherit;box-shadow:none;color:inherit;display:block;float:none;font:inherit;font-family:inherit;font-style:normal;font-weight:normal;font-size:inherit;letter-spacing:0;line-height:inherit;margin:0;max-height:none;max-width:none;min-height:0;min-width:0;padding:0;position:static;text-decoration:none;text-transform:none;text-shadow:none;transition:none;word-wrap:normal;-webkit-tap-highlight-color:rgba(0,0,0,0);-webkit-user-select:none;-webkit-font-smoothing:antialiased} #wistia_chrome_1012 #wistia_grid_1019_wrapper svg.w-css-reset{box-sizing:inherit;box-shadow:none;color:inherit;display:block;float:none;font:inherit;font-family:inherit;font-style:normal;font-weight:normal;font-size:inherit;letter-spacing:0;line-height:inherit;margin:0;max-height:none;max-width:none;min-height:0;min-width:0;padding:0;position:static;text-decoration:none;text-transform:none;text-shadow:none;transition:none;word-wrap:normal;-webkit-tap-highlight-color:rgba(0,0,0,0);-webkit-user-select:none;-webkit-font-smoothing:antialiased} #wistia_chrome_1012 #wistia_grid_1019_wrapper p.w-css-reset{box-sizing:inherit;box-shadow:none;color:inherit;display:block;float:none;font:inherit;font-family:inherit;font-style:normal;font-weight:normal;font-size:inherit;letter-spacing:0;line-height:inherit;margin:0;max-height:none;max-width:none;min-height:0;min-width:0;padding:0;position:static;text-decoration:none;text-transform:none;text-shadow:none;transition:none;word-wrap:normal;-webkit-tap-highlight-color:rgba(0,0,0,0);-webkit-user-select:none;-webkit-font-smoothing:antialiased} #wistia_chrome_1012 #wistia_grid_1019_wrapper a.w-css-reset{border:0;} #wistia_chrome_1012 #wistia_grid_1019_wrapper h1.w-css-reset{box-sizing:inherit;box-shadow:none;color:inherit;display:block;float:none;font:inherit;font-family:inherit;font-style:normal;font-weight:normal;font-size:2em;letter-spacing:0;line-height:inherit;margin:0;max-height:none;max-width:none;min-height:0;min-width:0;padding:0;position:static;text-decoration:none;text-transform:none;text-shadow:none;transition:none;word-wrap:normal;-webkit-tap-highlight-color:rgba(0,0,0,0);-webkit-user-select:none;-webkit-font-smoothing:antialiased} #wistia_chrome_1012 #wistia_grid_1019_wrapper h2.w-css-reset{box-sizing:inherit;box-shadow:none;color:inherit;display:block;float:none;font:inherit;font-family:inherit;font-style:normal;font-weight:normal;font-size:1.5em;letter-spacing:0;line-height:inherit;margin:0;max-height:none;max-width:none;min-height:0;min-width:0;padding:0;position:static;text-decoration:none;text-transform:none;text-shadow:none;transition:none;word-wrap:normal;-webkit-tap-highlight-color:rgba(0,0,0,0);-webkit-user-select:none;-webkit-font-smoothing:antialiased} #wistia_chrome_1012 #wistia_grid_1019_wrapper h3.w-css-reset{box-sizing:inherit;box-shadow:none;color:inherit;display:block;float:none;font:inherit;font-family:inherit;font-style:normal;font-weight:normal;font-size:1.17em;letter-spacing:0;line-height:inherit;margin:0;max-height:none;max-width:none;min-height:0;min-width:0;padding:0;position:static;text-decoration:none;text-transform:none;text-shadow:none;transition:none;word-wrap:normal;-webkit-tap-highlight-color:rgba(0,0,0,0);-webkit-user-select:none;-webkit-font-smoothing:antialiased} #wistia_chrome_1012 #wistia_grid_1019_wrapper p.w-css-reset{margin:1.4em 0;} #wistia_chrome_1012 #wistia_grid_1019_wrapper a.w-css-reset{display:inline;} #wistia_chrome_1012 #wistia_grid_1019_wrapper span.w-css-reset{display:inline;} #wistia_chrome_1012 #wistia_grid_1019_wrapper svg.w-css-reset{display:inline;} #wistia_chrome_1012 #wistia_grid_1019_wrapper ul.w-css-reset{box-sizing:inherit;box-shadow:none;color:inherit;display:block;float:none;font:inherit;font-family:inherit;font-style:normal;font-weight:normal;font-size:inherit;letter-spacing:0;line-height:inherit;margin:0;max-height:none;max-width:none;min-height:0;min-width:0;padding:0;position:static;text-decoration:none;text-transform:none;text-shadow:none;transition:none;word-wrap:normal;-webkit-tap-highlight-color:rgba(0,0,0,0);-webkit-user-select:none;-webkit-font-smoothing:antialiased;list-style-type:none} #wistia_chrome_1012 #wistia_grid_1019_wrapper ol.w-css-reset{box-sizing:inherit;box-shadow:none;color:inherit;display:block;float:none;font:inherit;font-family:inherit;font-style:normal;font-weight:normal;font-size:inherit;letter-spacing:0;line-height:inherit;margin:0;max-height:none;max-width:none;min-height:0;min-width:0;padding:0;position:static;text-decoration:none;text-transform:none;text-shadow:none;transition:none;word-wrap:normal;-webkit-tap-highlight-color:rgba(0,0,0,0);-webkit-user-select:none;-webkit-font-smoothing:antialiased;list-style-type:none} #wistia_chrome_1012 #wistia_grid_1019_wrapper li.w-css-reset{box-sizing:inherit;box-shadow:none;color:inherit;display:block;float:none;font:inherit;font-family:inherit;font-style:normal;font-weight:normal;font-size:inherit;letter-spacing:0;line-height:inherit;margin:0;max-height:none;max-width:none;min-height:0;min-width:0;padding:0;position:static;text-decoration:none;text-transform:none;text-shadow:none;transition:none;word-wrap:normal;-webkit-tap-highlight-color:rgba(0,0,0,0);-webkit-user-select:none;-webkit-font-smoothing:antialiased;list-style-type:none} #wistia_chrome_1012 #wistia_grid_1019_wrapper ul:before.w-css-reset{display:none} #wistia_chrome_1012 #wistia_grid_1019_wrapper ol:before.w-css-reset{display:none} #wistia_chrome_1012 #wistia_grid_1019_wrapper li:before.w-css-reset{display:none} #wistia_chrome_1012 #wistia_grid_1019_wrapper ul:after.w-css-reset{display:none} #wistia_chrome_1012 #wistia_grid_1019_wrapper ol:after.w-css-reset{display:none} #wistia_chrome_1012 #wistia_grid_1019_wrapper li:after.w-css-reset{display:none} #wistia_chrome_1012 #wistia_grid_1019_wrapper label.w-css-reset{background-attachment:scroll;background-color:transparent;background-image:none;background-position:0 0;background-repeat:no-repeat;background-size:100% 100%;float:none;outline:none} #wistia_chrome_1012 #wistia_grid_1019_wrapper button.w-css-reset{background-attachment:scroll;background-color:transparent;background-image:none;background-position:0 0;background-repeat:no-repeat;background-size:100% 100%;border:0;border-radius:0;outline:none;position:static} #wistia_chrome_1012 #wistia_grid_1019_wrapper img.w-css-reset{border:0;display:inline-block;vertical-align:top;border-radius:0;outline:none;position:static} #wistia_chrome_1012 #wistia_grid_1019_wrapper .w-css-reset button::-moz-focus-inner{border: 0;} #wistia_chrome_1012 #wistia_grid_1019_wrapper .w-css-reset-tree {font-size:14px;} #wistia_chrome_1012 #wistia_grid_1019_wrapper .w-css-reset-tree div{box-sizing:inherit;box-shadow:none;color:inherit;display:block;float:none;font:inherit;font-family:inherit;font-style:normal;font-weight:normal;font-size:inherit;letter-spacing:0;line-height:inherit;margin:0;max-height:none;max-width:none;min-height:0;min-width:0;padding:0;position:static;text-decoration:none;text-transform:none;text-shadow:none;transition:none;word-wrap:normal;-webkit-tap-highlight-color:rgba(0,0,0,0);-webkit-user-select:none;-webkit-font-smoothing:antialiased} #wistia_chrome_1012 #wistia_grid_1019_wrapper .w-css-reset-tree span{box-sizing:inherit;box-shadow:none;color:inherit;display:block;float:none;font:inherit;font-family:inherit;font-style:normal;font-weight:normal;font-size:inherit;letter-spacing:0;line-height:inherit;margin:0;max-height:none;max-width:none;min-height:0;min-width:0;padding:0;position:static;text-decoration:none;text-transform:none;text-shadow:none;transition:none;word-wrap:normal;-webkit-tap-highlight-color:rgba(0,0,0,0);-webkit-user-select:none;-webkit-font-smoothing:antialiased} #wistia_chrome_1012 #wistia_grid_1019_wrapper .w-css-reset-tree ul{box-sizing:inherit;box-shadow:none;color:inherit;display:block;float:none;font:inherit;font-family:inherit;font-style:normal;font-weight:normal;font-size:inherit;letter-spacing:0;line-height:inherit;margin:0;max-height:none;max-width:none;min-height:0;min-width:0;padding:0;position:static;text-decoration:none;text-transform:none;text-shadow:none;transition:none;word-wrap:normal;-webkit-tap-highlight-color:rgba(0,0,0,0);-webkit-user-select:none;-webkit-font-smoothing:antialiased} #wistia_chrome_1012 #wistia_grid_1019_wrapper .w-css-reset-tree li{box-sizing:inherit;box-shadow:none;color:inherit;display:block;float:none;font:inherit;font-family:inherit;font-style:normal;font-weight:normal;font-size:inherit;letter-spacing:0;line-height:inherit;margin:0;max-height:none;max-width:none;min-height:0;min-width:0;padding:0;position:static;text-decoration:none;text-transform:none;text-shadow:none;transition:none;word-wrap:normal;-webkit-tap-highlight-color:rgba(0,0,0,0);-webkit-user-select:none;-webkit-font-smoothing:antialiased} #wistia_chrome_1012 #wistia_grid_1019_wrapper .w-css-reset-tree label{box-sizing:inherit;box-shadow:none;color:inherit;display:block;float:none;font:inherit;font-family:inherit;font-style:normal;font-weight:normal;font-size:inherit;letter-spacing:0;line-height:inherit;margin:0;max-height:none;max-width:none;min-height:0;min-width:0;padding:0;position:static;text-decoration:none;text-transform:none;text-shadow:none;transition:none;word-wrap:normal;-webkit-tap-highlight-color:rgba(0,0,0,0);-webkit-user-select:none;-webkit-font-smoothing:antialiased} #wistia_chrome_1012 #wistia_grid_1019_wrapper .w-css-reset-tree fieldset{box-sizing:inherit;box-shadow:none;color:inherit;display:block;float:none;font:inherit;font-family:inherit;font-style:normal;font-weight:normal;font-size:inherit;letter-spacing:0;line-height:inherit;margin:0;max-height:none;max-width:none;min-height:0;min-width:0;padding:0;position:static;text-decoration:none;text-transform:none;text-shadow:none;transition:none;word-wrap:normal;-webkit-tap-highlight-color:rgba(0,0,0,0);-webkit-user-select:none;-webkit-font-smoothing:antialiased} #wistia_chrome_1012 #wistia_grid_1019_wrapper .w-css-reset-tree button{box-sizing:inherit;box-shadow:none;color:inherit;display:block;float:none;font:inherit;font-family:inherit;font-style:normal;font-weight:normal;font-size:inherit;letter-spacing:0;line-height:inherit;margin:0;max-height:none;max-width:none;min-height:0;min-width:0;padding:0;position:static;text-decoration:none;text-transform:none;text-shadow:none;transition:none;word-wrap:normal;-webkit-tap-highlight-color:rgba(0,0,0,0);-webkit-user-select:none;-webkit-font-smoothing:antialiased} #wistia_chrome_1012 #wistia_grid_1019_wrapper .w-css-reset-tree img{box-sizing:inherit;box-shadow:none;color:inherit;display:block;float:none;font:inherit;font-family:inherit;font-style:normal;font-weight:normal;font-size:inherit;letter-spacing:0;line-height:inherit;margin:0;max-height:none;max-width:none;min-height:0;min-width:0;padding:0;position:static;text-decoration:none;text-transform:none;text-shadow:none;transition:none;word-wrap:normal;-webkit-tap-highlight-color:rgba(0,0,0,0);-webkit-user-select:none;-webkit-font-smoothing:antialiased} #wistia_chrome_1012 #wistia_grid_1019_wrapper .w-css-reset-tree a{box-sizing:inherit;box-shadow:none;color:inherit;display:block;float:none;font:inherit;font-family:inherit;font-style:normal;font-weight:normal;font-size:inherit;letter-spacing:0;line-height:inherit;margin:0;max-height:none;max-width:none;min-height:0;min-width:0;padding:0;position:static;text-decoration:none;text-transform:none;text-shadow:none;transition:none;word-wrap:normal;-webkit-tap-highlight-color:rgba(0,0,0,0);-webkit-user-select:none;-webkit-font-smoothing:antialiased} #wistia_chrome_1012 #wistia_grid_1019_wrapper .w-css-reset-tree svg{box-sizing:inherit;box-shadow:none;color:inherit;display:block;float:none;font:inherit;font-family:inherit;font-style:normal;font-weight:normal;font-size:inherit;letter-spacing:0;line-height:inherit;margin:0;max-height:none;max-width:none;min-height:0;min-width:0;padding:0;position:static;text-decoration:none;text-transform:none;text-shadow:none;transition:none;word-wrap:normal;-webkit-tap-highlight-color:rgba(0,0,0,0);-webkit-user-select:none;-webkit-font-smoothing:antialiased} #wistia_chrome_1012 #wistia_grid_1019_wrapper .w-css-reset-tree p{box-sizing:inherit;box-shadow:none;color:inherit;display:block;float:none;font:inherit;font-family:inherit;font-style:normal;font-weight:normal;font-size:inherit;letter-spacing:0;line-height:inherit;margin:0;max-height:none;max-width:none;min-height:0;min-width:0;padding:0;position:static;text-decoration:none;text-transform:none;text-shadow:none;transition:none;word-wrap:normal;-webkit-tap-highlight-color:rgba(0,0,0,0);-webkit-user-select:none;-webkit-font-smoothing:antialiased} #wistia_chrome_1012 #wistia_grid_1019_wrapper .w-css-reset-tree a{border:0;} #wistia_chrome_1012 #wistia_grid_1019_wrapper .w-css-reset-tree h1{box-sizing:inherit;box-shadow:none;color:inherit;display:block;float:none;font:inherit;font-family:inherit;font-style:normal;font-weight:normal;font-size:2em;letter-spacing:0;line-height:inherit;margin:0;max-height:none;max-width:none;min-height:0;min-width:0;padding:0;position:static;text-decoration:none;text-transform:none;text-shadow:none;transition:none;word-wrap:normal;-webkit-tap-highlight-color:rgba(0,0,0,0);-webkit-user-select:none;-webkit-font-smoothing:antialiased} #wistia_chrome_1012 #wistia_grid_1019_wrapper .w-css-reset-tree h2{box-sizing:inherit;box-shadow:none;color:inherit;display:block;float:none;font:inherit;font-family:inherit;font-style:normal;font-weight:normal;font-size:1.5em;letter-spacing:0;line-height:inherit;margin:0;max-height:none;max-width:none;min-height:0;min-width:0;padding:0;position:static;text-decoration:none;text-transform:none;text-shadow:none;transition:none;word-wrap:normal;-webkit-tap-highlight-color:rgba(0,0,0,0);-webkit-user-select:none;-webkit-font-smoothing:antialiased} #wistia_chrome_1012 #wistia_grid_1019_wrapper .w-css-reset-tree h3{box-sizing:inherit;box-shadow:none;color:inherit;display:block;float:none;font:inherit;font-family:inherit;font-style:normal;font-weight:normal;font-size:1.17em;letter-spacing:0;line-height:inherit;margin:0;max-height:none;max-width:none;min-height:0;min-width:0;padding:0;position:static;text-decoration:none;text-transform:none;text-shadow:none;transition:none;word-wrap:normal;-webkit-tap-highlight-color:rgba(0,0,0,0);-webkit-user-select:none;-webkit-font-smoothing:antialiased} #wistia_chrome_1012 #wistia_grid_1019_wrapper .w-css-reset-tree p{margin:1.4em 0;} #wistia_chrome_1012 #wistia_grid_1019_wrapper .w-css-reset-tree a{display:inline;} #wistia_chrome_1012 #wistia_grid_1019_wrapper .w-css-reset-tree span{display:inline;} #wistia_chrome_1012 #wistia_grid_1019_wrapper .w-css-reset-tree svg{display:inline;} #wistia_chrome_1012 #wistia_grid_1019_wrapper .w-css-reset-tree ul{box-sizing:inherit;box-shadow:none;color:inherit;display:block;float:none;font:inherit;font-family:inherit;font-style:normal;font-weight:normal;font-size:inherit;letter-spacing:0;line-height:inherit;margin:0;max-height:none;max-width:none;min-height:0;min-width:0;padding:0;position:static;text-decoration:none;text-transform:none;text-shadow:none;transition:none;word-wrap:normal;-webkit-tap-highlight-color:rgba(0,0,0,0);-webkit-user-select:none;-webkit-font-smoothing:antialiased;list-style-type:none} #wistia_chrome_1012 #wistia_grid_1019_wrapper .w-css-reset-tree ol{box-sizing:inherit;box-shadow:none;color:inherit;display:block;float:none;font:inherit;font-family:inherit;font-style:normal;font-weight:normal;font-size:inherit;letter-spacing:0;line-height:inherit;margin:0;max-height:none;max-width:none;min-height:0;min-width:0;padding:0;position:static;text-decoration:none;text-transform:none;text-shadow:none;transition:none;word-wrap:normal;-webkit-tap-highlight-color:rgba(0,0,0,0);-webkit-user-select:none;-webkit-font-smoothing:antialiased;list-style-type:none} #wistia_chrome_1012 #wistia_grid_1019_wrapper .w-css-reset-tree li{box-sizing:inherit;box-shadow:none;color:inherit;display:block;float:none;font:inherit;font-family:inherit;font-style:normal;font-weight:normal;font-size:inherit;letter-spacing:0;line-height:inherit;margin:0;max-height:none;max-width:none;min-height:0;min-width:0;padding:0;position:static;text-decoration:none;text-transform:none;text-shadow:none;transition:none;word-wrap:normal;-webkit-tap-highlight-color:rgba(0,0,0,0);-webkit-user-select:none;-webkit-font-smoothing:antialiased;list-style-type:none} #wistia_chrome_1012 #wistia_grid_1019_wrapper .w-css-reset-tree ul:before{display:none} #wistia_chrome_1012 #wistia_grid_1019_wrapper .w-css-reset-tree ol:before{display:none} #wistia_chrome_1012 #wistia_grid_1019_wrapper .w-css-reset-tree li:before{display:none} #wistia_chrome_1012 #wistia_grid_1019_wrapper .w-css-reset-tree ul:after{display:none} #wistia_chrome_1012 #wistia_grid_1019_wrapper .w-css-reset-tree ol:after{display:none} #wistia_chrome_1012 #wistia_grid_1019_wrapper .w-css-reset-tree li:after{display:none} #wistia_chrome_1012 #wistia_grid_1019_wrapper .w-css-reset-tree label{background-attachment:scroll;background-color:transparent;background-image:none;background-position:0 0;background-repeat:no-repeat;background-size:100% 100%;float:none;outline:none} #wistia_chrome_1012 #wistia_grid_1019_wrapper .w-css-reset-tree button{background-attachment:scroll;background-color:transparent;background-image:none;background-position:0 0;background-repeat:no-repeat;background-size:100% 100%;border:0;border-radius:0;outline:none;position:static} #wistia_chrome_1012 #wistia_grid_1019_wrapper .w-css-reset-tree img{border:0;display:inline-block;vertical-align:top;border-radius:0;outline:none;position:static} #wistia_chrome_1012 #wistia_grid_1019_wrapper .w-css-reset-tree button::-moz-focus-inner{border: 0;} #wistia_chrome_1012 #wistia_grid_1019_wrapper .w-css-reset-max-width-none-important{max-width:none!important} #wistia_chrome_1012 #wistia_grid_1019_wrapper .w-css-reset-button-important{border-radius:0!important;color:#fff!important;}
#wistia_grid_1019_wrapper{-moz-box-sizing:content-box;-webkit-box-sizing:content-box;box-sizing:content-box;font-family:Arial,sans-serif;font-size:14px;height:100%;position:relative;text-align:left;width:100%;} #wistia_grid_1019_wrapper *{-moz-box-sizing:content-box;-webkit-box-sizing:content-box;box-sizing:content-box;} #wistia_grid_1019_above{position:relative;} #wistia_grid_1019_main{display:block;height:100%;position:relative;} #wistia_grid_1019_behind{height:100%;left:0;position:absolute;top:0;width:100%;} #wistia_grid_1019_center{height:100%;overflow:hidden;position:relative;width:100%;} #wistia_grid_1019_front{display:none;height:100%;left:0;position:absolute;top:0;width:100%;} #wistia_grid_1019_top_inside{position:absolute;left:0;top:0;width:100%;} #wistia_grid_1019_top{width:100%;position:absolute;bottom:0;left:0;} #wistia_grid_1019_bottom_inside{position:absolute;left:0;bottom:0;width:100%;} #wistia_grid_1019_bottom{width:100%;position:absolute;top:0;left:0;} #wistia_grid_1019_left_inside{height:100%;position:absolute;left:0;top:0;} #wistia_grid_1019_left{height:100%;position:absolute;right:0;top:0;} #wistia_grid_1019_right_inside{height:100%;right:0;position:absolute;top:0;} #wistia_grid_1019_right{height:100%;left:0;position:absolute;top:0;} #wistia_grid_1019_below{position:relative;}
To reorder your links, hover over the six dots icon and drag and drop the links to where you want them.
A little inspiration
Check out these awesome, creative stores made by Payhip users for some inspiration.